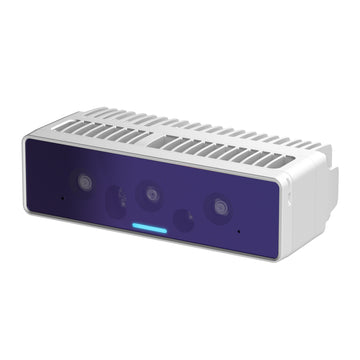
OAK4 Pro
Based on
Connection
USB 2/3 (up to 10 Gbps), Ethernet 2.5Gbps
Dot projector
Infrared
Yes
IMU
Yes
Sensor 1 - IMX586
Type
Color
DFOV / HFOV / VFOV
Size
1/2
Shutter
Rolling
Focus
Auto
Sensor 2, 3 - OV9282
Type
Monochrome
DFOV / HFOV / VFOV
Size
1/4
Shutter
Global
Focus
Fixed
Stereo
IR Projector
Looking for more details? Visit specific features at Platform -> Features
IR perception
The Pro version of this device has notch IR filters at 940nm on the stereo camera pair, which allows both visible light and IR light from illumination LED/laser dot projector to be perceived by the camera.IR Dot Projector
IR Illumination LED
IR Dot Projector
The IR laser dot projector projects many small dots in front of the device, which helps with disparity matching, especially for low-visual-interest surfaces (blank surfaces with little to no texture), such as a wall or floor. The technique that we use is called ASV - conventional Active Stereo Vision - as stereo matching is performed on the device the same way as on OAK-D (passive stereo).On the image below there's a blank wall with no texture. Without the dot projector, (passive) depth perception is poor. With the dot projector set to ~200mA, the (active) depth perception looks much better. If you look closely at the bottom left frame, you can see little dots all around the wall.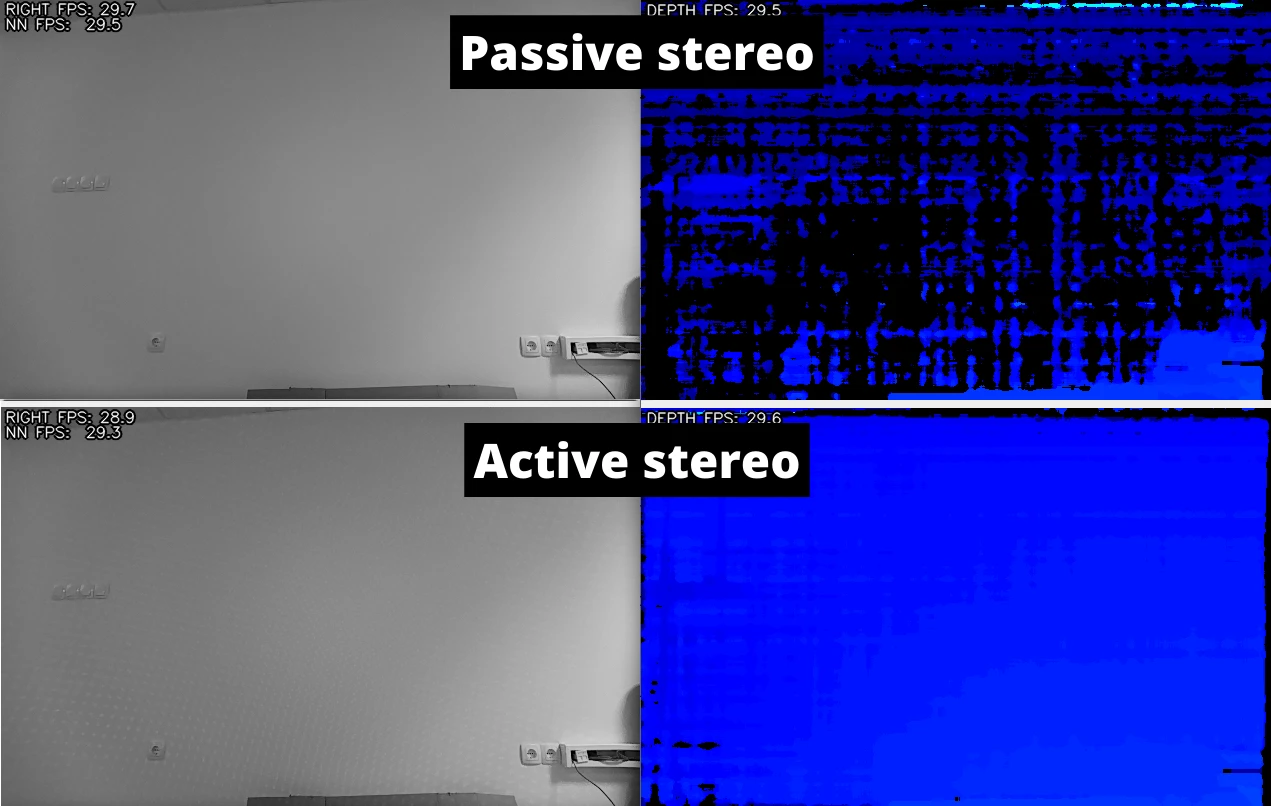
Laser dot projector and flood LED are disabled by default! That's because most people would prefer intentionally enabling the laser dot projector when they are wearing eye safety gear.
Getting started
You can set IR laser dot projector and illumination LED via the API as below:Python
1# Either within Script node:
2script = pipeline.create(dai.node.Script)
3script.setScript("""
4  Device.setIrLaserDotProjectorIntensity(0.5)
5  Device.setIrFloodLightIntensity(0)
6""")
7
8with dai.Device() as device:
9  # Or, using the dai.Device object from the host:
10  device.setIrLaserDotProjectorIntensity(0.5) # in %, from 0 to 1
11  device.setIrFloodLightIntensity(0.0) # in %, from 0 to 1
Dot projector specifications
Himax TL-10Datasheet
Number of dots
8208
HFOI* 50%
72
VFOI* 50%
77
VSCEL wavelength
940nm
Operating temperature
0°C to ~60°C
Temperature absolute limits
0°C to ~80°C
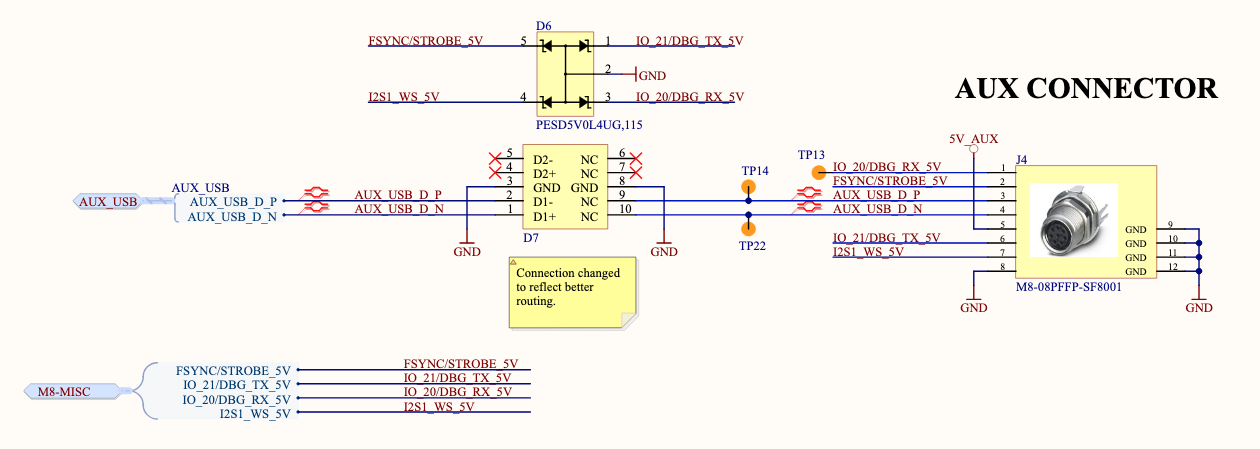
Connectors
M8 aux connector has 8pin female A-coded connector and the M12 ethernet has 8pin female X-coded connector. Cameras also include an M8 connector cap for waterproofing in case the M8 connector wouldn't be used.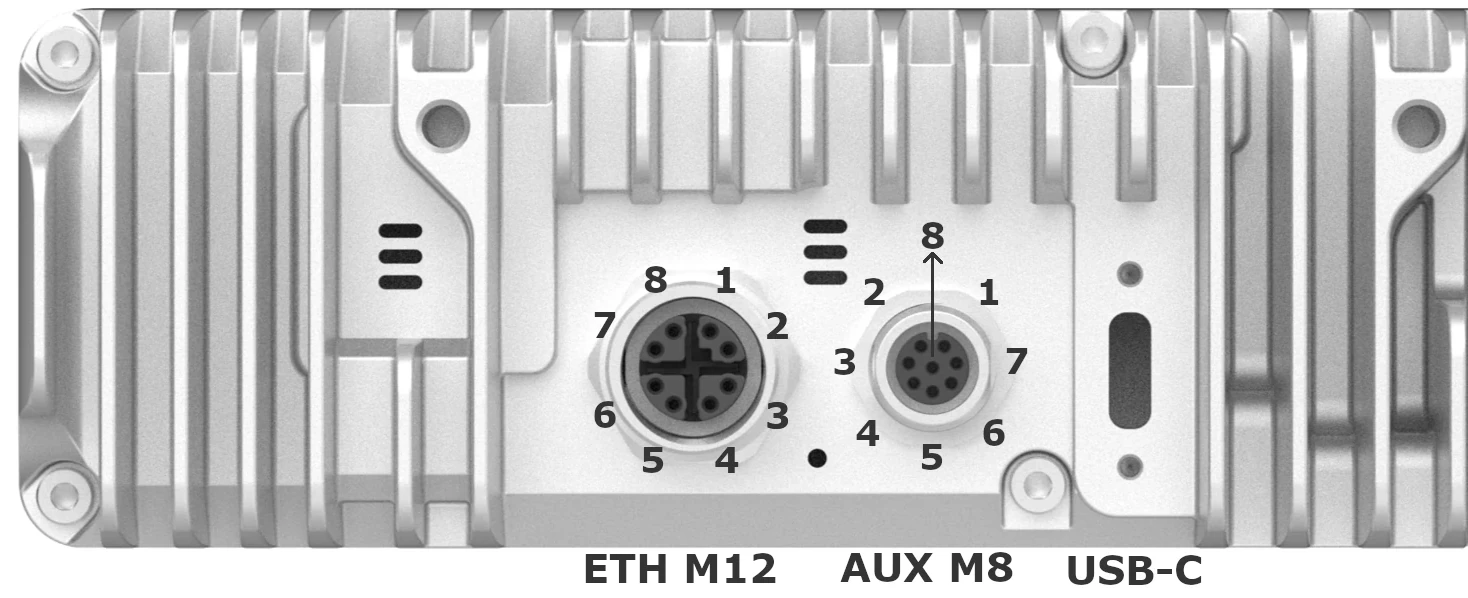
| Pin | M12 pin | M8 pin | M8 functionality |
|---|---|---|---|
| 1 | Eth MX0+ | GPIO_20/5V_RX | Either a 5V GPIO, or UART RX |
| 2 | Eth MX0- | FSYNC/STROBE_5V | FSYNC is the default, STROBE can be enabled |
| 3 | Eth MX1+ | USB D+ | USB 2.0 Host interface (Can't be used alongside USB-C interface) |
| 4 | Eth MX1- | USB D- | USB 2.0 Host interface (Can't be used alongside USB-C interface) |
| 5 | Eth MX3+ | 5V | This pin is used for sourcing 5V power (max 5W) to accessory devices connected to the M8 connector. |
| 6 | Eth MX3- | GPIO_21/5V_TX | Either a 5V GPIO, or UART TX |
| 7 | Eth MX2+ | DET_PIN | Used to detect what device is connected, can't be used for any other purpose |
| 8 | Eth MX2- | GND | Ground |
Power consumption
The RVC4 itself has a maximum power peaks of about 25W, which is mainly consumed by the SoC, Qualcomm's QCS8550, that is integrated inside the RVC4.- Max peak: 25W
- Max average: 10-15W
- Average idle: 1.6W
- Booting peak: 12W
- Booting average: 2.3W (~15sec)
IMU
This OAK camera has an integrated ICM-42688-P, a 6-axis IMU (Inertial Measurement Unit). A separate AK09919C, a 3-axis magnetometer is also integrated to allow for 9-axis IMU functionality.Laser Safety
This product is classified as a Class 1 Laser Product under the EN/IEC 60825-1, Edition 3 (2014) internationally.
- Do not power on the product if any external damage was observed.
- Do not attempt to open any portion of this laser product.
- Invisible laser radiation when opened. Avoid direct exposure to the beam.
- There are no user serviceable parts with this laser product.
- Modification or service of the stereo module, specifically the infrared projector, may cause the emissions to exceed Class 1.
- No magnifying optical elements, such as eye loupes and magnifiers, are allowed.
- Do not try to update camera firmware that is not officially released for specific camera module and revision.