Connect OAK to Luxonis Hub
OAK 4
Use setup.luxonis.com for the installation of OAK 4 devices.1
Select OAK 4 Type
Select the type of your OAK 4 device.
2
Setup Method
Both setup methods are identical, but the Hub provides a better experience for future use of the OAK 4. We recommend selecting 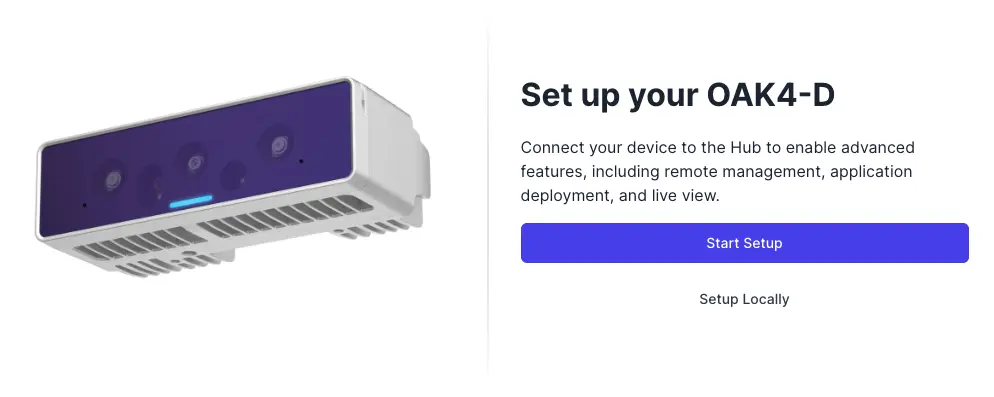
Start Setup, creating a new account in the Hub, or logging into an existing one.3
Configuration
Define the camera password and advanced options if neccessary.Advanced OptionsUse DHCP
Enables your device to automatically obtain an IP address, subnet mask and gateway settings from a DHCP server in the network.Enable SSH
Allows remote access to your device via the Secure Shell (SSH) protocol. Use this feature to securely configure or monitor the device over an encrypted connection.Require Internet Access
Device setup will not complete unless internet access can be established by the device.Enable Error Reporting
Enable detailed error reporting to enhance troubleshooting and system diagnostics. By selecting this option, you allow the collection of the following data: Pipeline Schema, Device Platform, OS Platform, Connection Type and Crash Dump. This information is crucial for identifying and resolving issues more efficiently.DepthAI Peripheral Mode
Enabling this option, exposes DepthAI server, giving access to the device from other hosts, using DepthAI library. This makes the device act similar to the RVC2 (OAK) device.Hostname
The unique name assigned to your device within the network. Use a descriptive and recognizable hostname for easier identification, especially in environments with multiple devices.
Enables your device to automatically obtain an IP address, subnet mask and gateway settings from a DHCP server in the network.Enable SSH
Allows remote access to your device via the Secure Shell (SSH) protocol. Use this feature to securely configure or monitor the device over an encrypted connection.
For login, use the default username 'oak' and the camera password you defined during setup.
Device setup will not complete unless internet access can be established by the device.Enable Error Reporting
Enable detailed error reporting to enhance troubleshooting and system diagnostics. By selecting this option, you allow the collection of the following data: Pipeline Schema, Device Platform, OS Platform, Connection Type and Crash Dump. This information is crucial for identifying and resolving issues more efficiently.DepthAI Peripheral Mode
Enabling this option, exposes DepthAI server, giving access to the device from other hosts, using DepthAI library. This makes the device act similar to the RVC2 (OAK) device.Hostname
The unique name assigned to your device within the network. Use a descriptive and recognizable hostname for easier identification, especially in environments with multiple devices.
4
Connect your OAK 4
Prepare your OAK 4 and connect the PoE/ETH cable to power it up.Scan the displayed QR code. Scanning can take a few seconds. Try keeping the camera steady without moving your hands.LED Status Codes
- Flashing Blue - The device is waiting to be set up
- Flashing Yellow - Setup is in progress
- Flashing Purple - Firmware update is running
- Flashing Green - Setup successful
- Flashing Red - Setup failed or there can be a potential power incompatibility
- Solid Blue - The device is ready
5
Complete Setup
After scanning the QR code and configuring the OAK 4, the setup automatically proceeds to the Device Visualizer to the default application running on your device.Setup with Hub
Connection to the Hub allows users to proceed not only to the Visualizer but also directly to the Device Detail or the list of Devices in the HUB, where you can manage your device.
Connection to the Hub allows users to proceed not only to the Visualizer but also directly to the Device Detail or the list of Devices in the HUB, where you can manage your device.
Other OAKs
For other OAKs, use the setup below.1
Prerequisites
- a Luxonis Hub account
- a Linux computer with supported operating system
- direct terminal access or SSH access
2
Install Agent
Copy and run the command for Custom Linux Install on the target computer.
Devices >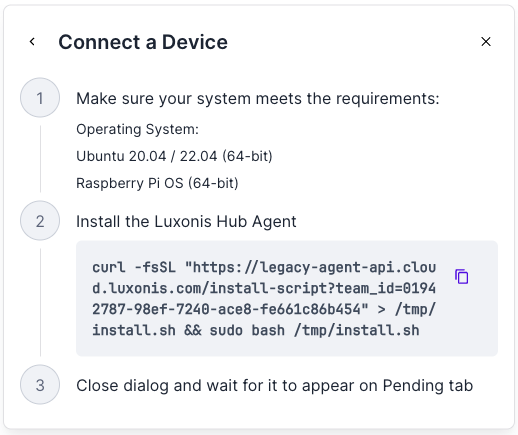 After a successful installation, a window will appear displaying a message indicating that the installation was completed.
Devices >
Connect Device > Custom Linux Install > Copy command from the dialogAfter a successful installation, a window will appear displaying a message indicating that the installation was completed.If you are experiencing issues with the installation process check the troubleshooting guide.
Command Line
1╭──────────────────────────────────────────────────────────╮
2│                                                          │
3│  Luxonis Hub Agent Installer                             │
4│  Linux / aarch64                                         │
5│                                                          │
6│  Installation complete!                                  │
7│  Use `hubctl help` to manage the agent.                  │
8│                                                          │
9╰──────────────────────────────────────────────────────────╯
3
Adopt Agent to the Hub

4
Connect the OAK
Plug your OAK into the USB port of your computer or connect it to your network via an Ethernet cable with PoE. The OAK will automatically appear in the OAKs tab under your device.