Deploy with Raspberry Pi
pip.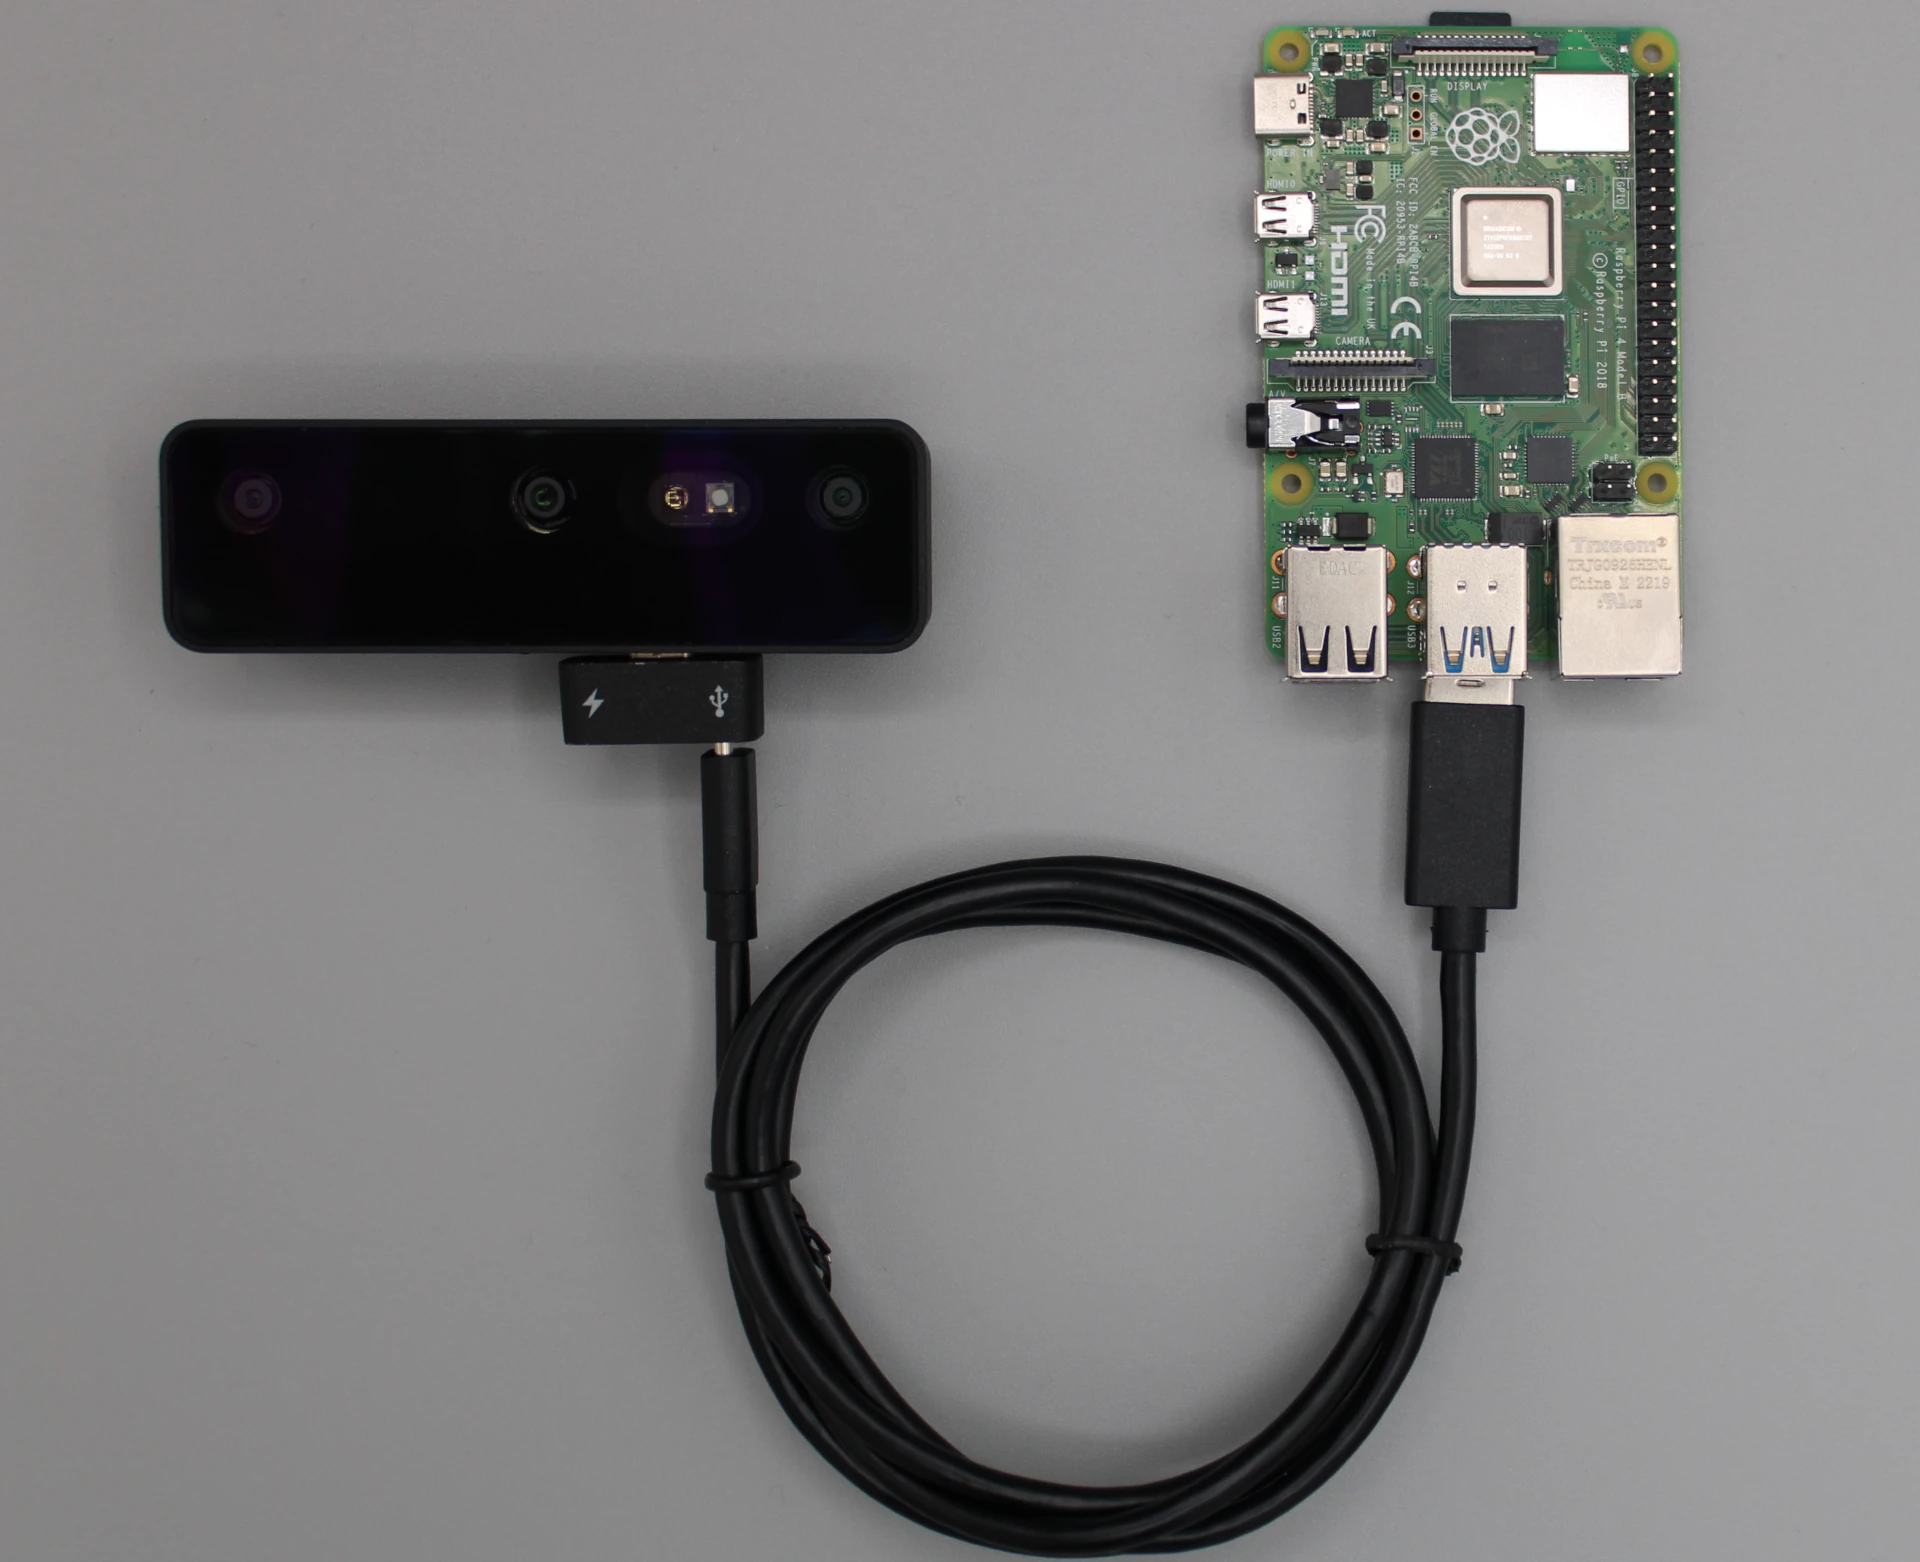 DepthAI library has prebuilt wheels for RPi on PyPi.
Using pre-configured RPi OS image
- OAK_CM4_POE - Uses RPi OS (default one), has pre-installed DepthAI. Required hardware: 8 GB uSD card or larger. This image is flashed on uSD cards that get sent with OAK-D CM4 and OAK-D CM4 PoE. To enable 2nd uSD card, see workaround here. We recommend that users use this image for all OAK cameras.
- KS_Rpi_OS_Full - Uses RPi Full OS, has pre-installed DepthAI and CEP. Required hardware: 32 GB uSD card or larger, RPi 4 with 4 GB RAM. This image was flashed on uSD cards that were sent to KickStarter backers. Only use this image if you want CEP platform!
Flashing uSD card
- Download the RPi image from Google Drive (link above). Download Balena Etcher program. You can also use RPi Imager, but we have noticed that sometimes there are issues.
- Open Balena Etcher. If you have downloaded .AppImage, you might need to right-click on it and click Run to start the program.
- Click on the Flash from file and select the .zip image you have previously downloaded.
- Select the target uSD card.
- Click Flash! and wait until it's finished.
- After flashing is complete, safely remove the uSD card, insert it into RPi, and power the RPi
Powering OAK from RPi
- Your pipeline is complex - especially video encoding and AI inferencing create power peaks that can lead to brownout.
- You have additional USB devices connected to a RPi USB port that draw too much current. In total, RPi can supply 1.2A, so if all USB devices draw more than 1.2A, brownout will occur.Bypass current limitationCheck this guide on how to bypass the current limitation. Note that this will void your warranty.
- You have the Pro version of the OAK camera that has IR laser dot projector and IR illumination LED, which additionally draw up to 0.25A.
SSH into the RPi
ssh inside this boot volume, so SSH server will be enabled on startup (tutorial here). If you have RPi with WiFi connectivity, you can set the WiFi SSID/Password by creating (and editing)
 wpa_supplicant.conf inside the boot volume (tutorial here).After connecting RPi via ethernet/WiFi to the same LAN as your computer, you can SSH into the RPi with the command below. If RPi and computer are not in the same LAN, you will have to specify RPi's IP instead of luxonis.local - which is the default name of your RPi on pre-configured RPi images.Command Line
1ssh pi@luxonis.local -X-X argument enables X11 forwarding on Linux - so OpenCV's imshow images will get forwarded to your computer via SSH. On MacOS, X11 isn't installed by default, so you have to download it, more information here.When you SSH into the RPi for the first time, it will warn you about authenticity, like the log below.Command Line
1The authenticity of host 'raspberrypi.local (192.168.1.222)' can't be established.
2ECDSA key fingerprint is SHA256:stb5mbRQeX6veOq8Wzg81rz9IHonxJR2++Q8bDYryTo.
3Are you sure you want to continue connecting (yes/no/[fingerprint])?yes to continue.After this command, you will need to provide the password. The default RPi OS password is raspberry. You should change it.After SSH was successful, let's try running an example app:Command Line
1python depthai-python/examples/MobileNet/rgb_mobilenet.py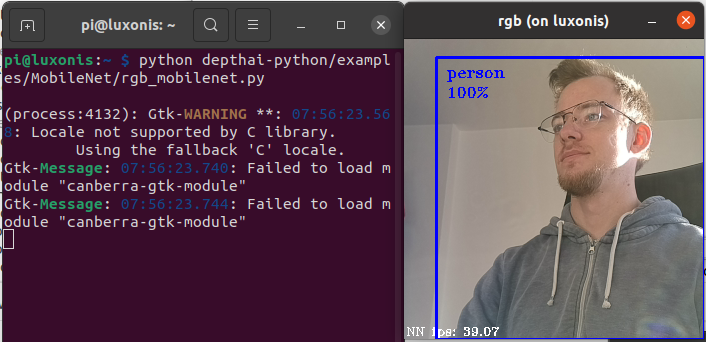
Known image limitations
- On OAK_CM4_PoE, since image V8, second uSD card support is disabled. That's because if uSD card support is enabled (for storage purposes), WiFi connectivity is disabled. To enable 2nd uSD card support (and disable WiFi connectivity), you can edit
/boot/config.txtand uncomment the linedtoverlay=sdhost,poll_once=offat the end of the file, then reboot the system.
Flashing an image to the eMMC
 To flash an image to the CM4 eMMC (official RPi guide), first need to enable USB_BOOT with the header pin. By default, connector is on the 2 header pins that are indicated as
 DIS (disabled), so we have to move the connector to the EN pins (enabled).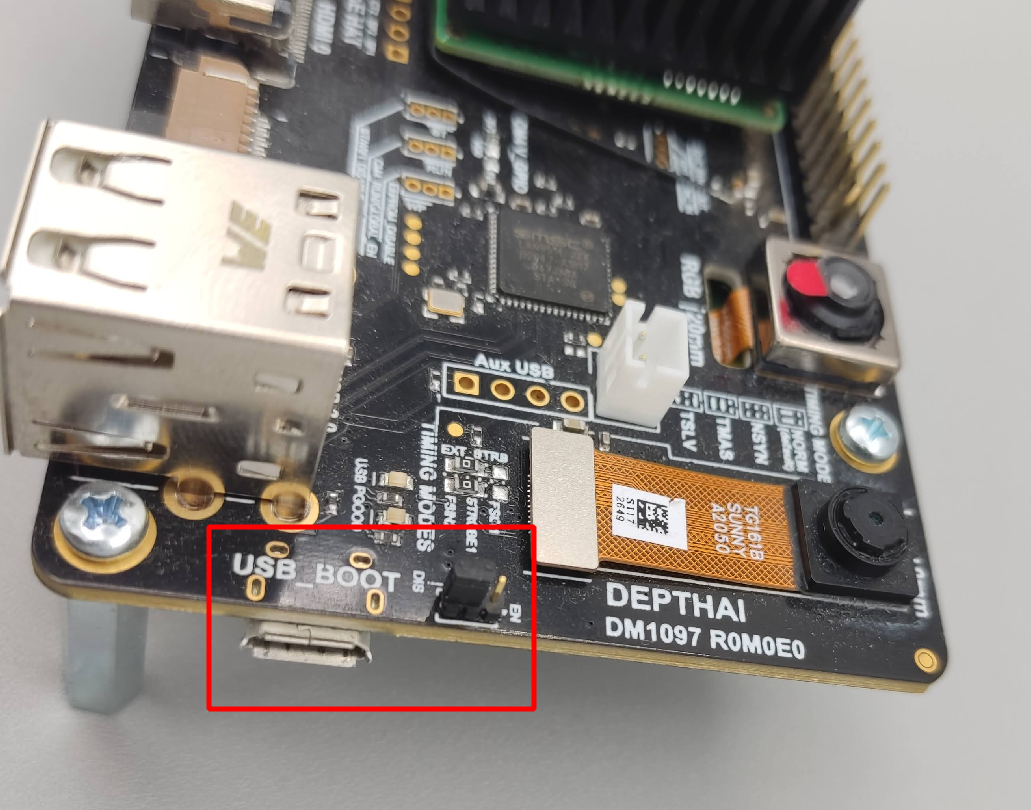 After switching the pin connector to
 EN, we can connect a micro-USB cable from our computer to the micro-USB connector that's also indicated by the red rectangle above. After connecting the micro-USB, you should supply the power via 5V barrel jack.After connecting both the micro-USB and power, we need to enable RPi USB boot. We have followed the tutorial here. After building the program and running it, you should see something similar:Command Line
1/Documents/usbboot$ sudo ./rpiboot
2RPIBOOT: build-date Apr 21 2022 version 20220315~121405 445356e1
3Waiting for BCM2835/6/7/2711...
4Loading embedded: bootcode4.bin
5Sending bootcode.bin
6Successful read 4 bytes
7Waiting for BCM2835/6/7/2711...
8Loading embedded: bootcode4.bin
9Second stage boot server
10Loading embedded: start4.elf
11File read: start4.elf
12Second stage boot server done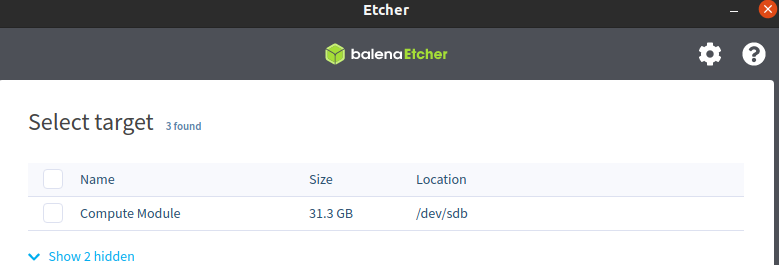
Raspberry Pi Zero
Connect OAK camera to a RPI Zero
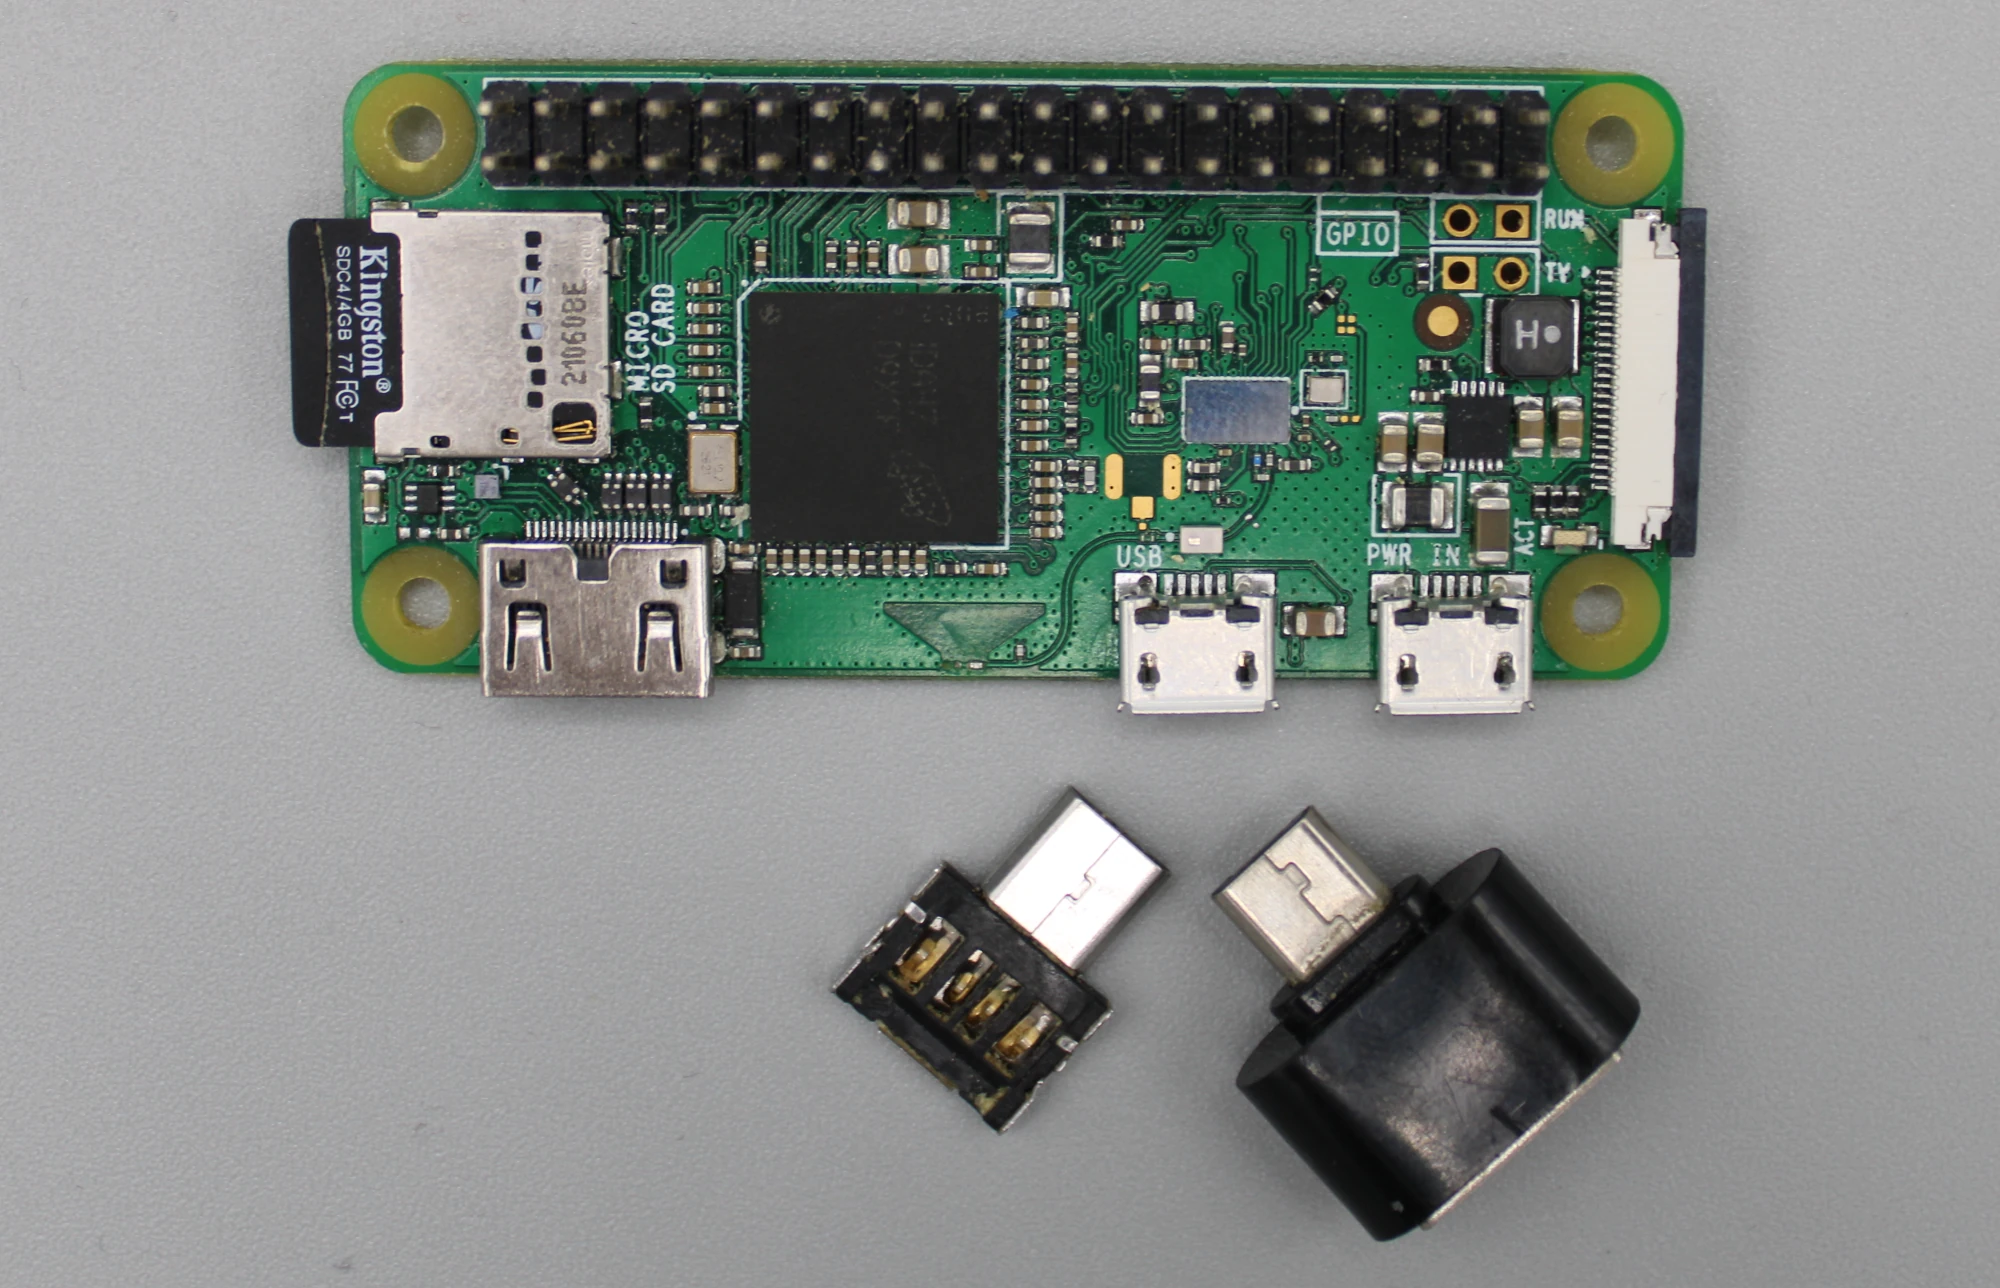 All of the above options work. We are not connected/affiliated with these companies, but here's where we got the left connector (Aliexpress), and right connector (Aliexpress).
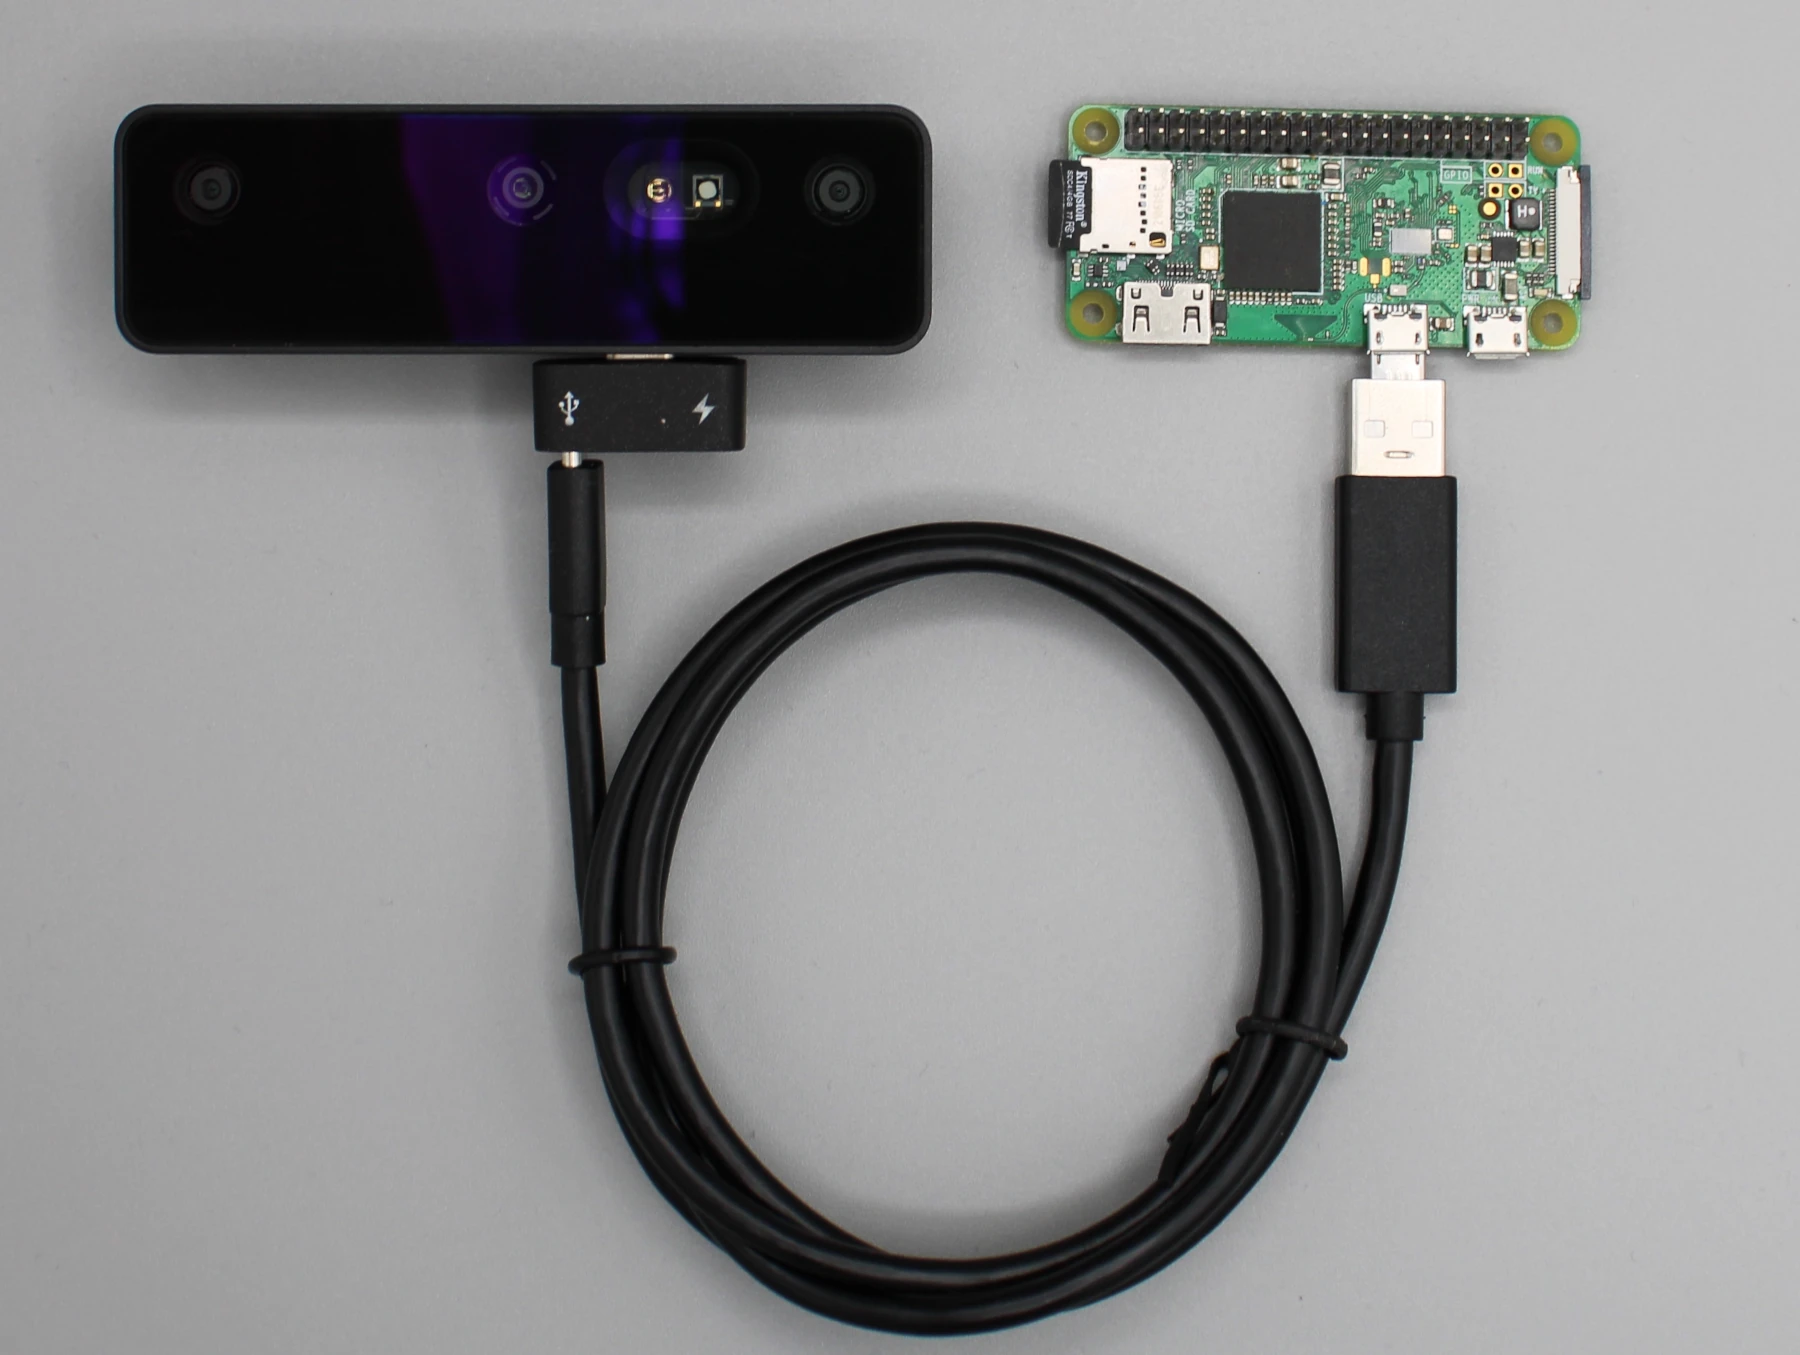 From our testing, RPi Zero was able to provide enough power to the OAK-D without an external power supply (either power jack or Y-adapter).
RPi Troubleshooting
RPi Locking Up / OAK crashing on RPi
SSH-ing without X11 forwarding
-x argument and try to display a frame (eg. cv2.imshow()), you will likely get an error like below:(-2:Unspecified error) Can't initialize GTK backend in function 'cvInitSystem'qt.qpa.xcb: could not connect to display. qt.qpa.plugin: Could not load the Qt platform plugin "xcb".This application failed to start because no Qt platform plugin could be initialized.