FFC deployment guide
Overview
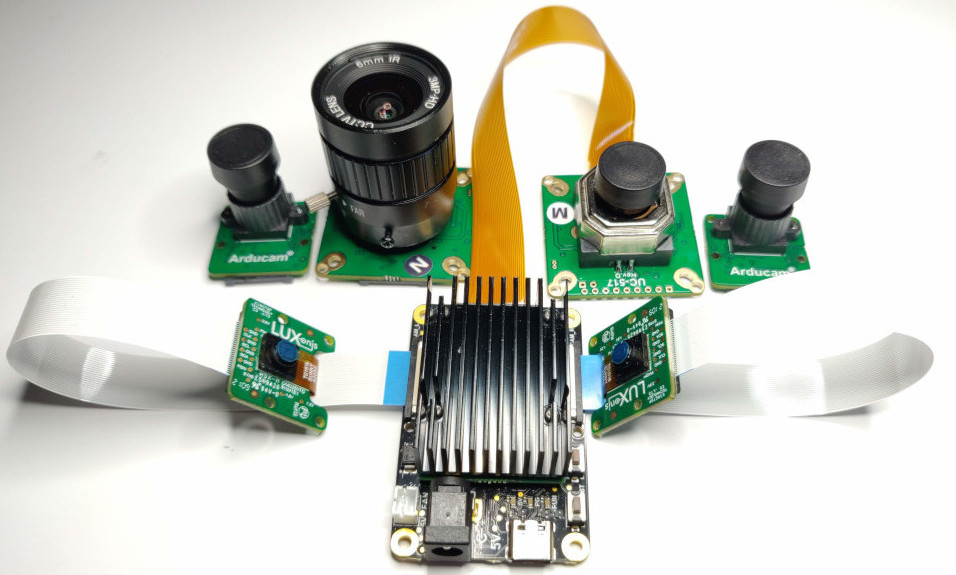
OAK FFC Baseboards
FFC Camera Modules
| OAK FFC Camera Module | Shutter | Resolution | Notes |
|---|---|---|---|
| OAK-FFC-IMX378 (AF) | Rolling | 12MP | Color, Auto-Focus |
| OAK-FFC-IMX378-FF | Rolling | 12MP | Color, Fixed-Focus |
| OAK-FFC-IMX378-W | Rolling | 12MP | Color, Fixed-Focus, Wide FOV |
| OAK-FFC-OV9282 | Global | 1MP | Mono, Fixed-Focus |
| OAK-FFC-OV9282-M12 | Global | 1MP | Mono, M12 mount |
| OAK-FFC-OV9282-W | Global | 1MP | Mono, Fixed-Focus, Wide FOV |
| OAK-FFC-OV9782-M12 | Global | 1MP | Color, M12 mount |
| OAK-FFC-OV9782-W | Global | 1MP | Color, Fixed-Focus, Wide FOV |
| OAK-FFC IMX582 | Rolling | 32MP | Color, AF |
| OAK-FFC-IMX577-M12 | Rolling | 12MP | Color, M12 mount |
| OAK-FFC-IMX214-W | Rolling | 13MP | Color, Fixed-Focus, Wide FOV |
| OAK-FFC-AR0234-M12 | Global | 2.3MP | Color, M12 mount |
| OAK-FFC-IMX462 (M12) | Rolling | 2MP | Color, Fixed-Focus |
| Arducam HQ Cam for RPi, IMX477 | Rolling | 12.3MP | Color, CS mount lens |
Raspberry Pi Camera Modules
| RPi Camera Module | Sensor | Shutter | Pixels | Notes |
|---|---|---|---|---|
| RPi Camera Module 3 | IMX708 | Rolling | 12 MP | Color, Auto-Focus. Initial (WIP) integration |
| RPi Camera Module 2 | IMX219 | Rolling | 8 MP | Color, Fixed-Focus. Requires imx219 branch |
| RPi High Quality Camera | IMX477 | Rolling | 12 MP | Color, C/CS mount |
| RPi Global Shutter Camera | IMX296 | Global | 1.6 MP | Color, C/CS mount. Might have color artifacts, see workaround here |
The UC-244 Adapter doesn't work out-of-the-box with the RPi HQ and Global Shutter cameras. Additional steps are required and described here.
FFC Camera Mounting
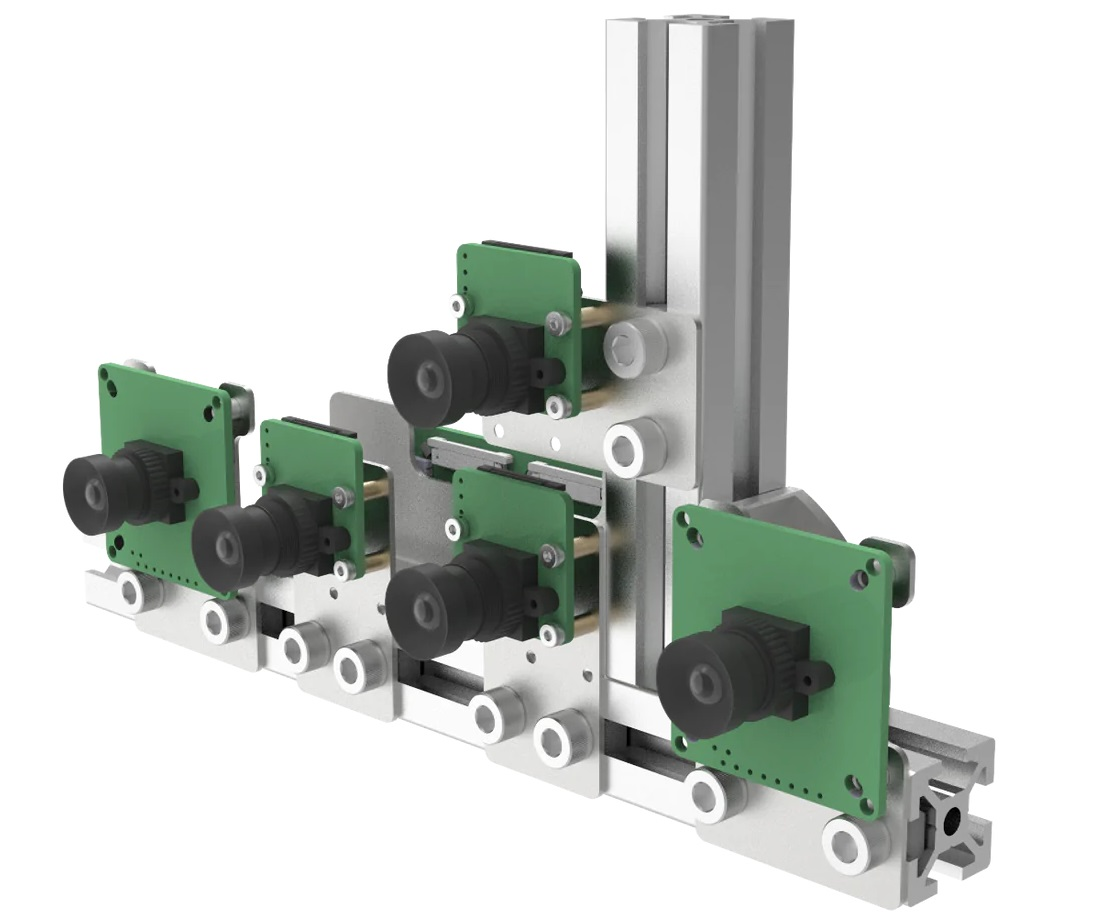 Mounting adapters can also be found on Github.
M12 Mount Lenses
- Kit of 10 different M12 lenses (for testing purposes),
- M25156H14 (HFoV: 141°),
- M40180H10 (HFoV: 100°),
- M2506ZH04 (HFoV: 33°),
- and others.
M12 Selectable FOV
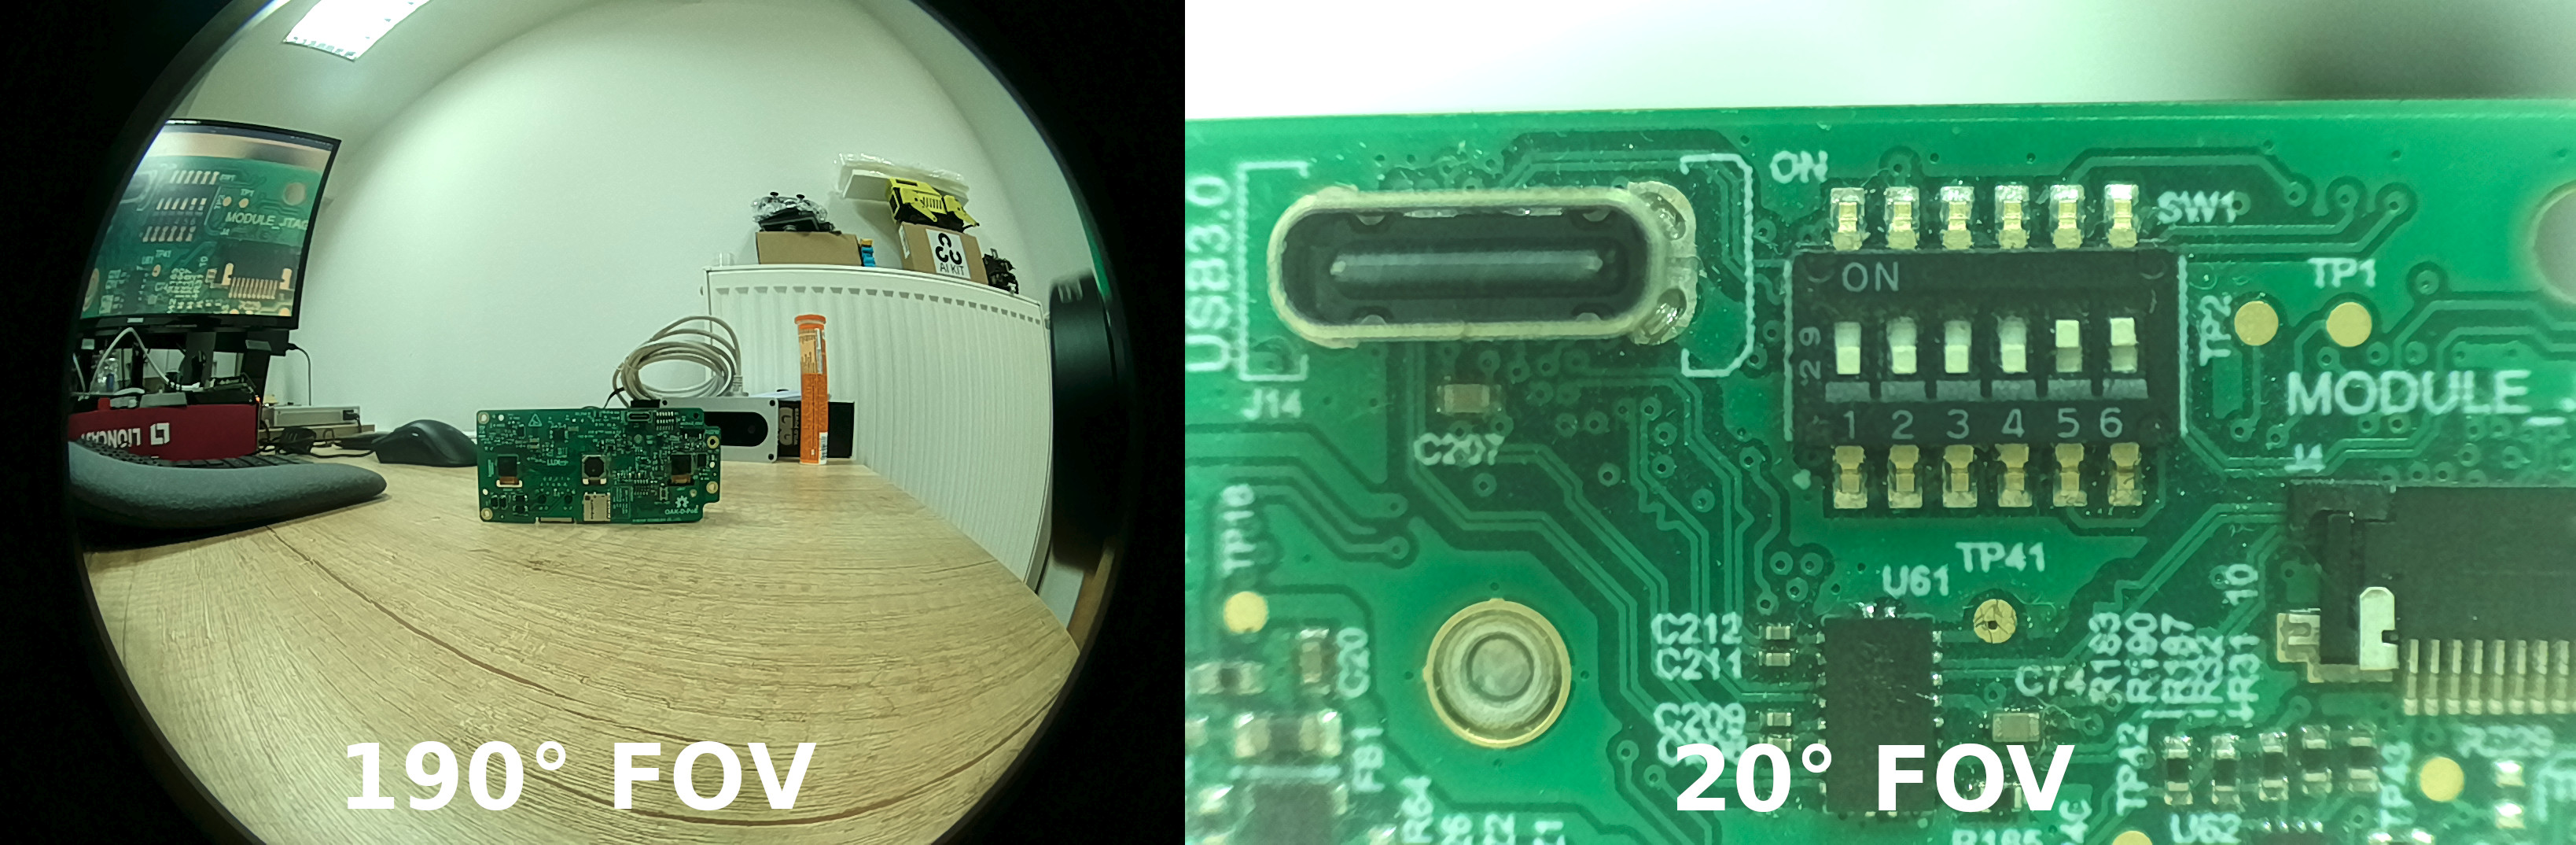 Test setup from birds view:
Test setup from birds view
Developing with the OAK FFC
1
Installing requirements
Depending on which FFC device you are using, you can check the getting started guide for either:After installing the dependencies and depthai library, you can start developing with the OAK FFC devices.
2
Testing the configuration
After connecting cameras to the baseboard, you can use the utilities/cam_test.py script to quickly test whether cameras are working as expected. By default, it will try to run 2x mono cameras on 2-lane MIPI ports B (left) and C (right) and 2x color cameras on port A (RGB) and D (4-lane MIPI ports).If you have different cameras connected, you can specify which camera types to use with the For example, if you have 3x mono cameras connected to ports A, B, and C, you can run the following command:
--cameras argument:Command Line
1cam_test.py [-h] [--cameras <BoardSocket>,<CameraType>]Command Line
1python3 cam_test.py --cameras rgb,m right,m left,m3
Use cameras in code
Similarly, to add such configuration into your script you can use the following code:
Python
C++
Python
Python
1cam_a = pipeline.create(dai.node.Camera)
2cam_a.build(dai.CameraBoardSocket.CAM_A) # Same as CameraBoardSocket.RGB
3
4cam_b = pipeline.create(dai.node.Camera)
5cam_b.build(dai.CameraBoardSocket.CAM_B) # Same as CameraBoardSocket.LEFT
6
7cam_c = pipeline.create(dai.node.Camera)
8cam_c.build(dai.CameraBoardSocket.CAM_C) # Same as CameraBoardSocket.RIGHT
9
10cam_d = pipeline.create(dai.node.Camera)
11cam_d.build(dai.CameraBoardSocket.CAM_D)Extending functionality
PSRBS Connector
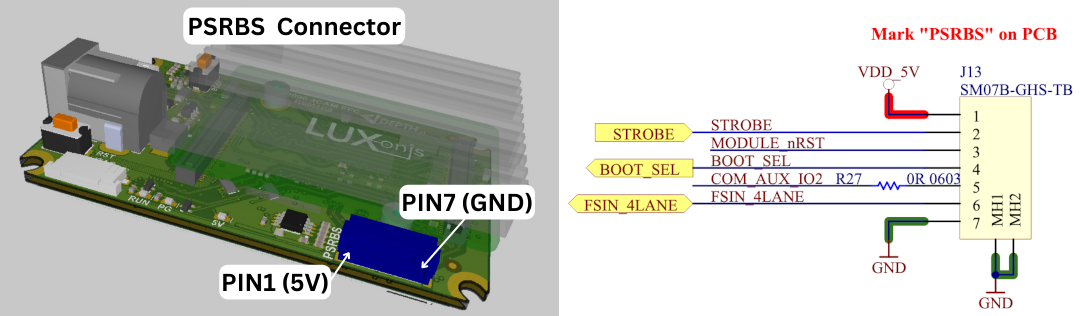
| Pin | Name | Description |
|---|---|---|
| 1 | VDD_5V | 5V power input/output |
| 2 | STROBE | Strobe signal output, can drive external lighting (projector, illumination lights, etc.) |
| 3 | MODULE_nRST | Allows resetting the OAK-FFC from an external source (GND will reset the RVC2, same as RST button) |
| 4 | BOOT_SEL | Allows selecting whether to boot into the bootloader (1.8V will skip bootloader, same as BOOT button) |
| 5 | COM_AUX_IO2 | 2-lane MIPI FSYNC signal input/output |
| 6 | FSIN_4LANE | 4-lane MIPI FSYNC signal input/output |
| 7 | GND | GND power input/output |
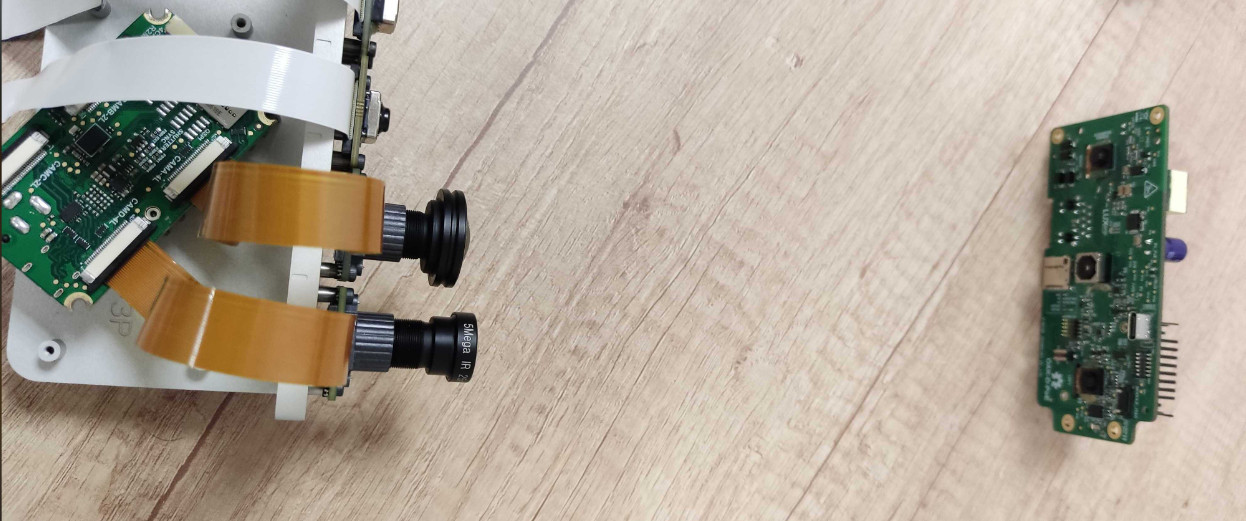
Connecting an IR Module
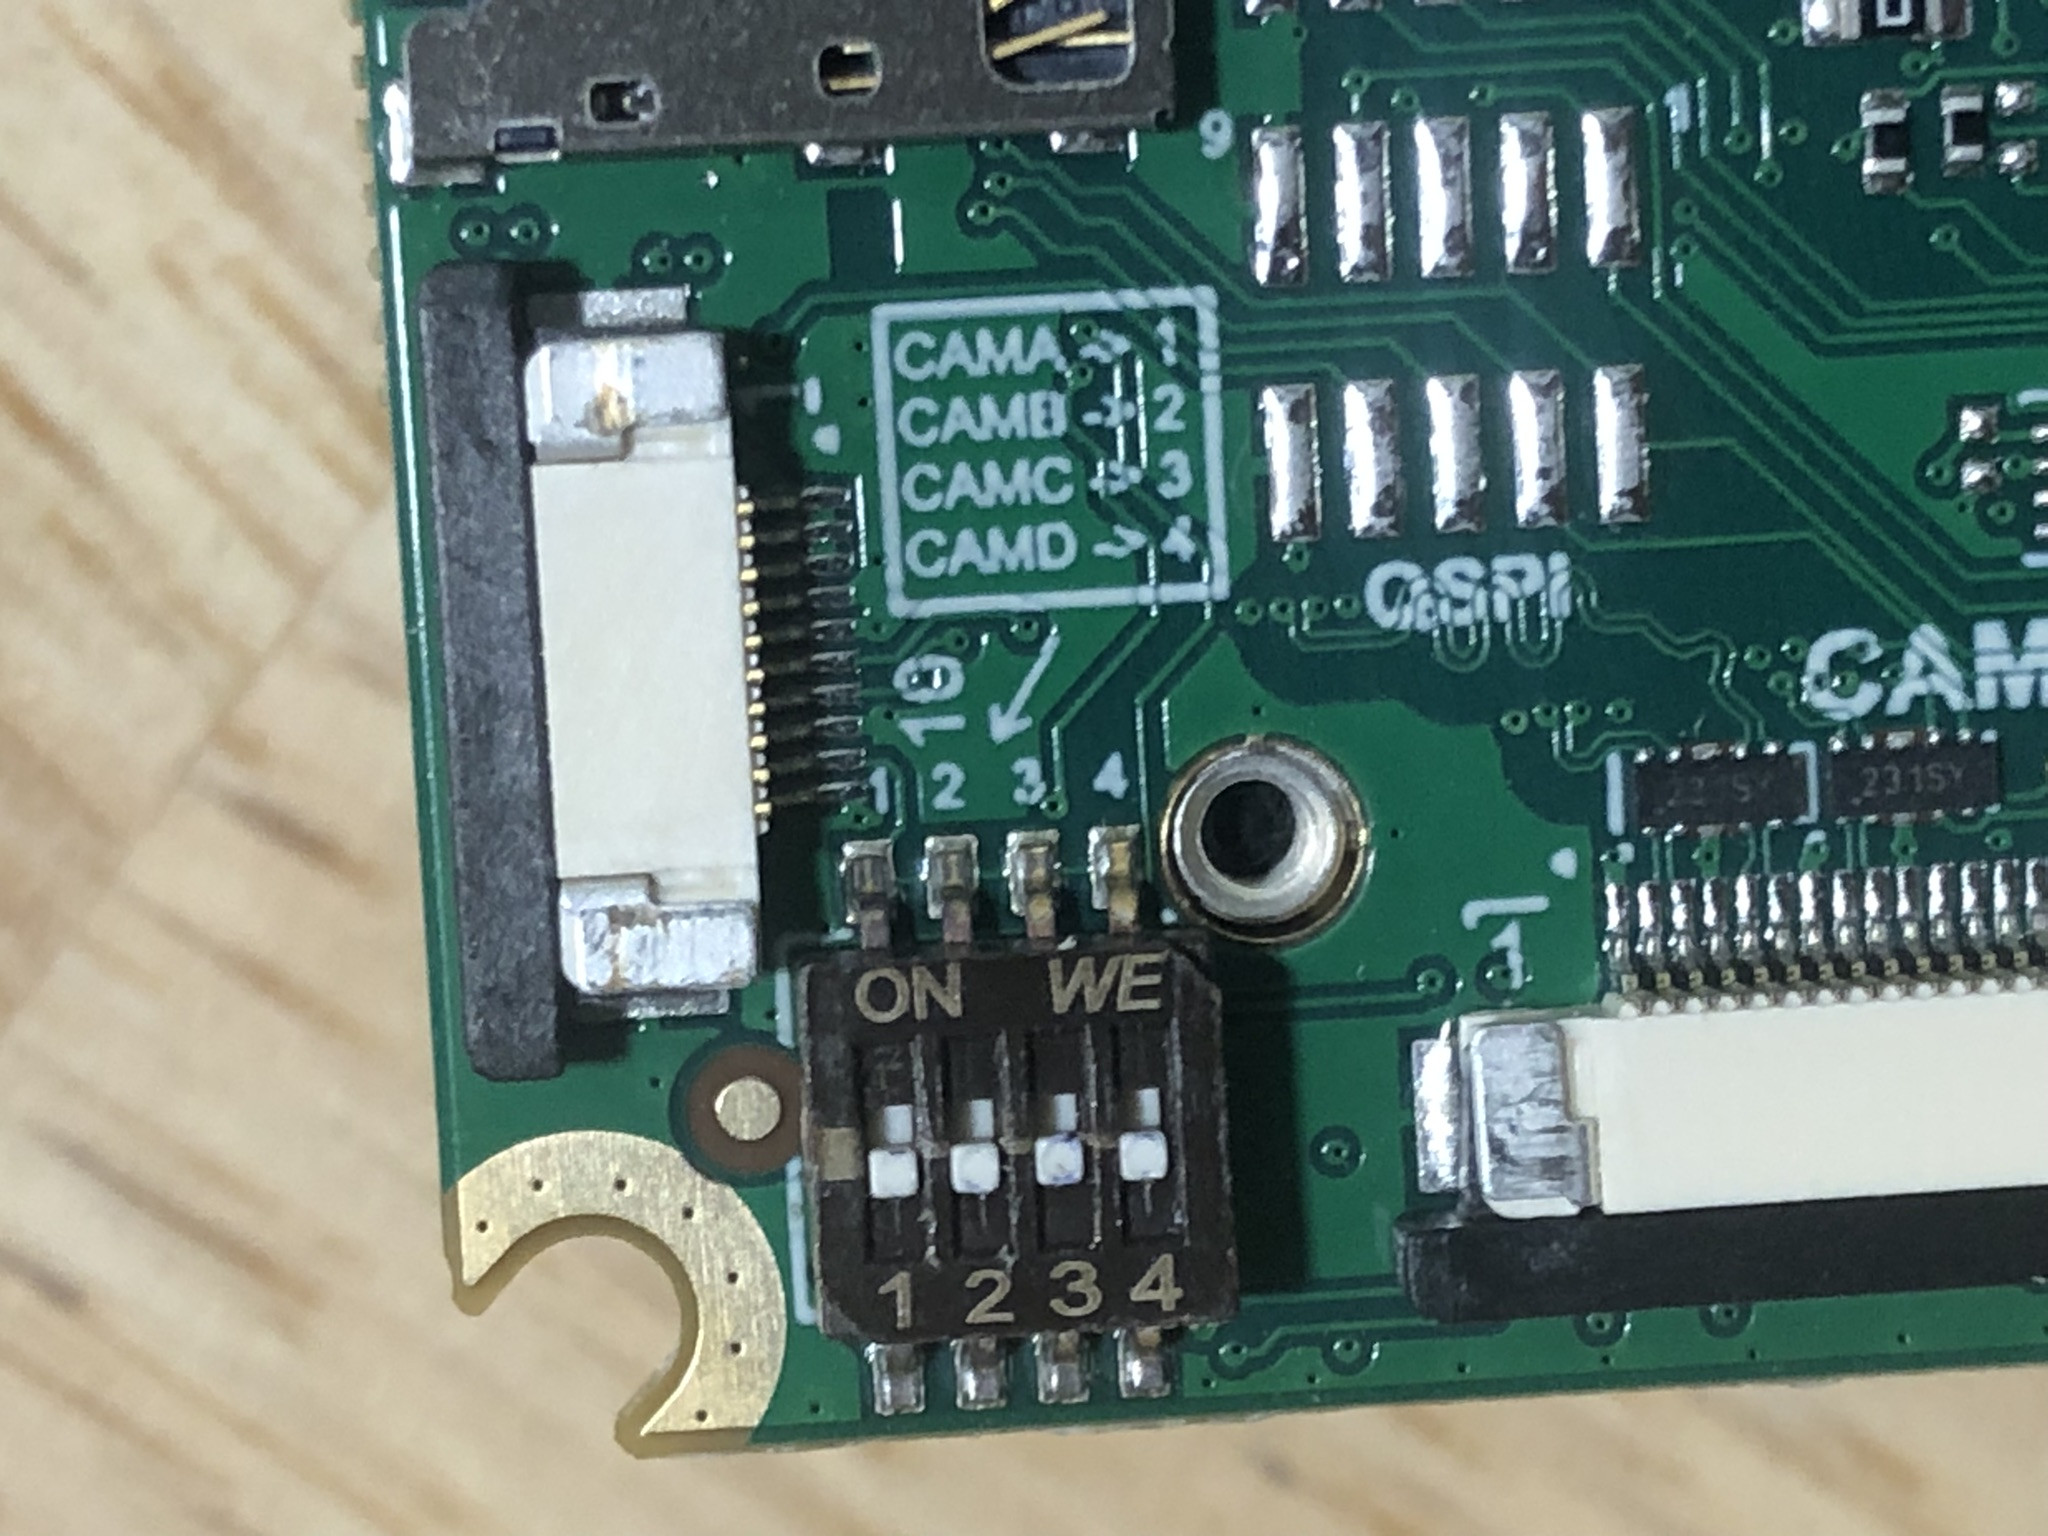 If you have a stereo pair on CAM_B and CAM_C and want to have a dot projector synced with the stereo pair, you should move the switch 2 or 3 up (ON). Keep in mind that only one switch can be up at a time.
UART
UART Pinout
| OAK-FFC Device | TX | RX |
|---|---|---|
| OAK-FFC-4P | 15 | 16 |
| OAK-FFC-4P POE | / | / |
| OAK-FFC-1P POE | 45 | 46 |
| OAK-FFC-3P | / | / |
SD Card support
Need assistance?
Head over to Discussion Forum for technical support or any other questions you might have.