OAK4 Getting Started
1
Powering
OAK4 cameras consume up to 25W of power (peaks) and require PoE+ (802.3at, 30W) injector/switch for power (eg. TL-SG1008P). After being powered and booted, status light should turn solid blue, indicating that the device is ready.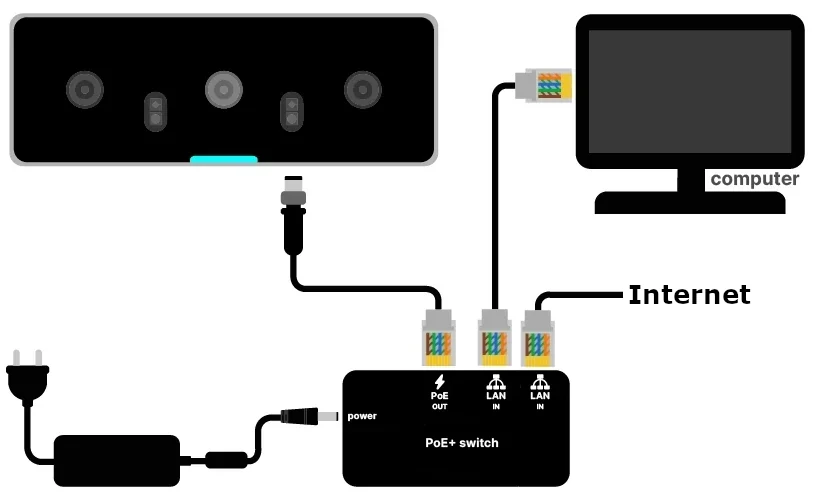
PoE+ & Internet
Normal PoE (802.3af, 15W) injector/switch won't be able to provide enough power. We recommend having the switch connected to the internet to get the best experience.
2
OAK Viewer
OAK Viewer is a desktop GUI application that allows you to visualize the camera's streams and interact with the device. It is available for Windows, macOS, and Linux.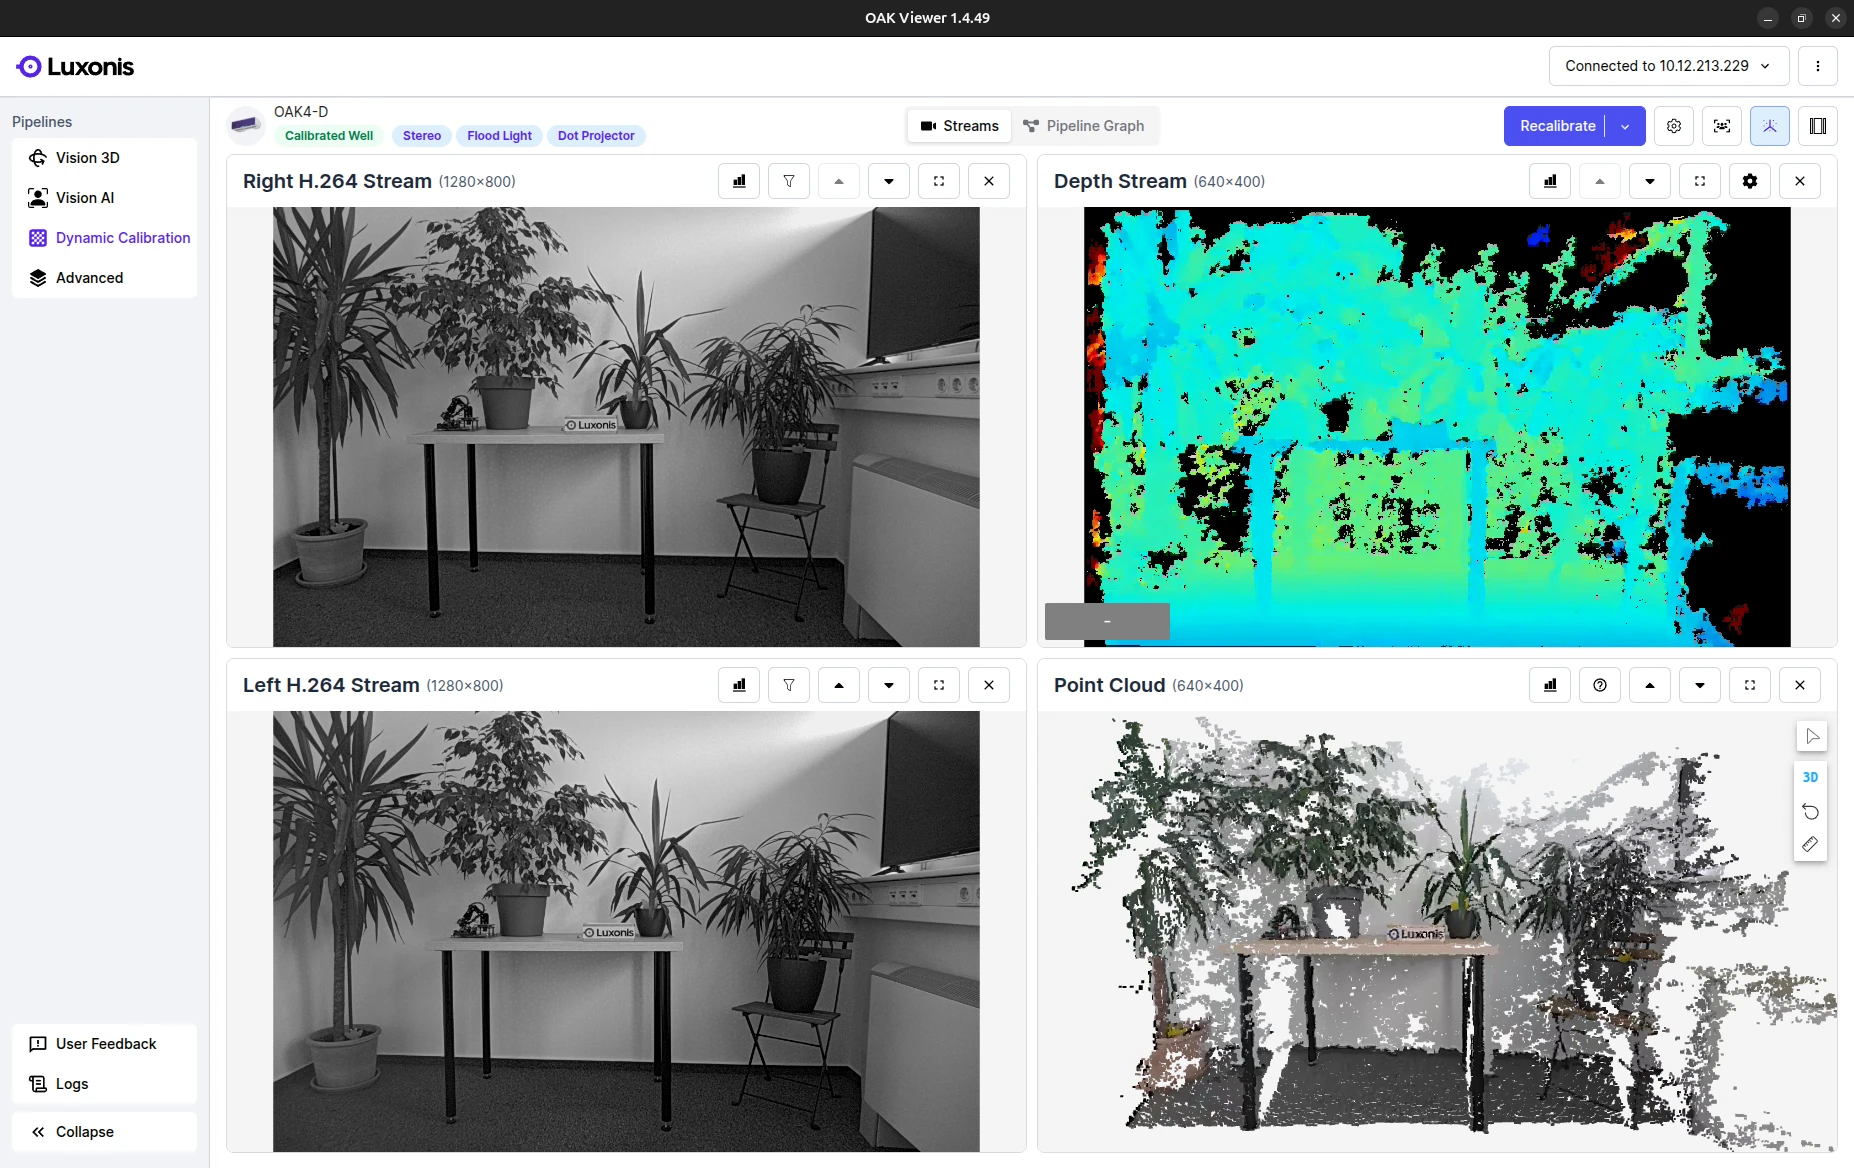 OAK Viewer 1.6.3 for Ubuntu 24.04 / 22.04 (x86)More details can be found on the OAK Viewer Documentation page.
Download now:
Linux
macOS
Windows
Linux
Debian packages are available for Ubuntu 24.04 / 22.04, supporting x86_64 (AMD64) architecture.
3
(Optional) Connect to Hub
If you want to connect the camera to Luxonis Hub and explore the ecosystem click on the "Adopt to Hub" button in the OAK Viewer, confirm factory reset and select new password. Once setup is complete, a
Hub tag will be shown on your device in OAK Viewer.Step by step instructions:1. Click Adopt To Hub
If you want to connect the camera to Luxonis Hub and explore the ecosystem click on the "Adopt to Hub" button in the OAK Viewer.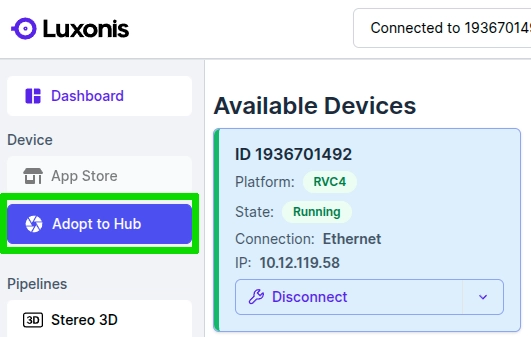
2. Acknowledge data deletion
You will get a warning about the on-device data deletion if you continue with the Hub setup. This will delete all user data - including 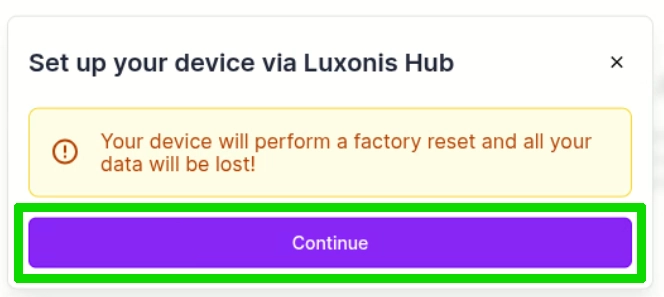
/data/ and the user overlay. After this step you will be redirected to a web browser.3. Insert new password
Insert password and advanced settings if necessary.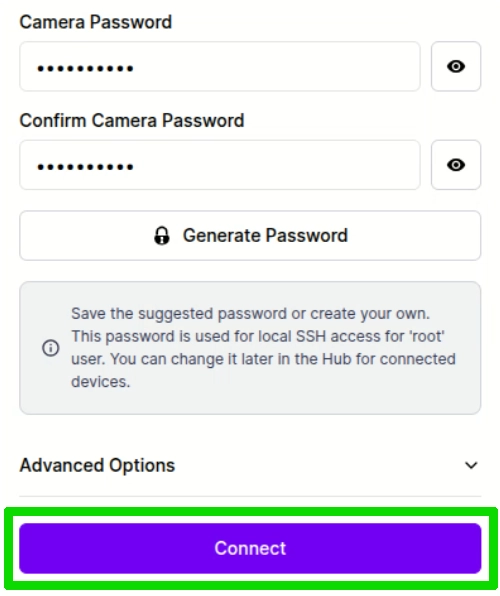
4. Confirm successful finish
Navigating back to the OAK Viewer you should now see a 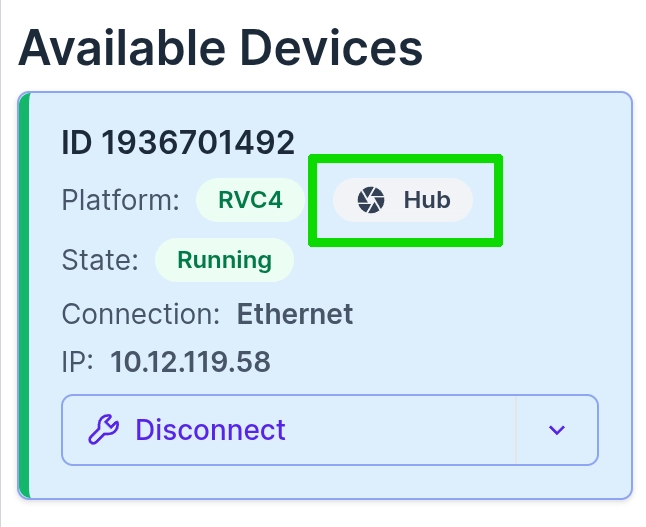
Hub tag next to your device indicating that the camera is successfully connected to the Luxonis Hub.Connecting to Hub enables SSH
Devices running OS 1.18 or newer ship with password-based SSH disabled; completing Luxonis Hub setup turns SSH back on and applies the password you configure in that flow.
4
Develop
5
Factory Reset & Troubleshooting
Factory reset warning
This will reset the device to factory settings, removing all configurations and data. Make sure to back up any important data before proceeding.
Factory Reset
- Press and hold the reset button for 10 seconds.
- The front LED blinks orange after ~5 seconds.
- Keep holding; at ~10 seconds the LED blinks red and then turns off, indicating that the factory reset has started.
- Release the button once the LED turns off and wait for the device to reboot (this may take a few seconds).
Troubleshooting
Red light (insufficient power)
Blue light does not behave as expected
No DHCP
Orange light (device issue)
Reset Button malfunction
Red light (insufficient power)
Before booting, the OAK4 camera checks for a PoE+ (30W) signal. If not detected, the red light flashes, but the device will still attempt to boot if enough power is available. OAK4 negotiates per IEEE 802.3at for Type 2 (30W PoE+). If negotiation fails or a passive PSE is used, it defaults to Class 0 (15W) and may be underpowered, triggering the red LED as a warning.Some PoE injectors, like Ubiquiti's PoE+ injector, provide enough power but don't signal compliance. In such cases, OAK4 flashes red before booting and turning blue when operational.
6
Advanced
Head on over to Advanced section to see how to:
Need assistance?
Head over to Discussion Forum for technical support or any other questions you might have.