DepthAI V3
Installation
Linux / MacOS
Windows
Linux / MacOS
1. Install DepthAI v3
Command Line
1git clone https://github.com/luxonis/depthai-core.git && cd depthai-core
2python3 -m venv venv
3source venv/bin/activate
4# Installs library and requirements
5python3 examples/python/install_requirements.pyCommand Line
1pip install depthai --force-reinstall2. Run an example
After installing the library, you can run an example, eg. Detection Network example or Display all cameras:
Command Line
1cd examples/python
2# Run YoloV6 detection example
3python3 DetectionNetwork/detection_network.py
4# Display all camera streams
5python3 Camera/camera_all.py
Developing with C++?
DepthAI v3 is largely written in C++. The build instructions are available on the depthai-core repository.
Github pageComponents

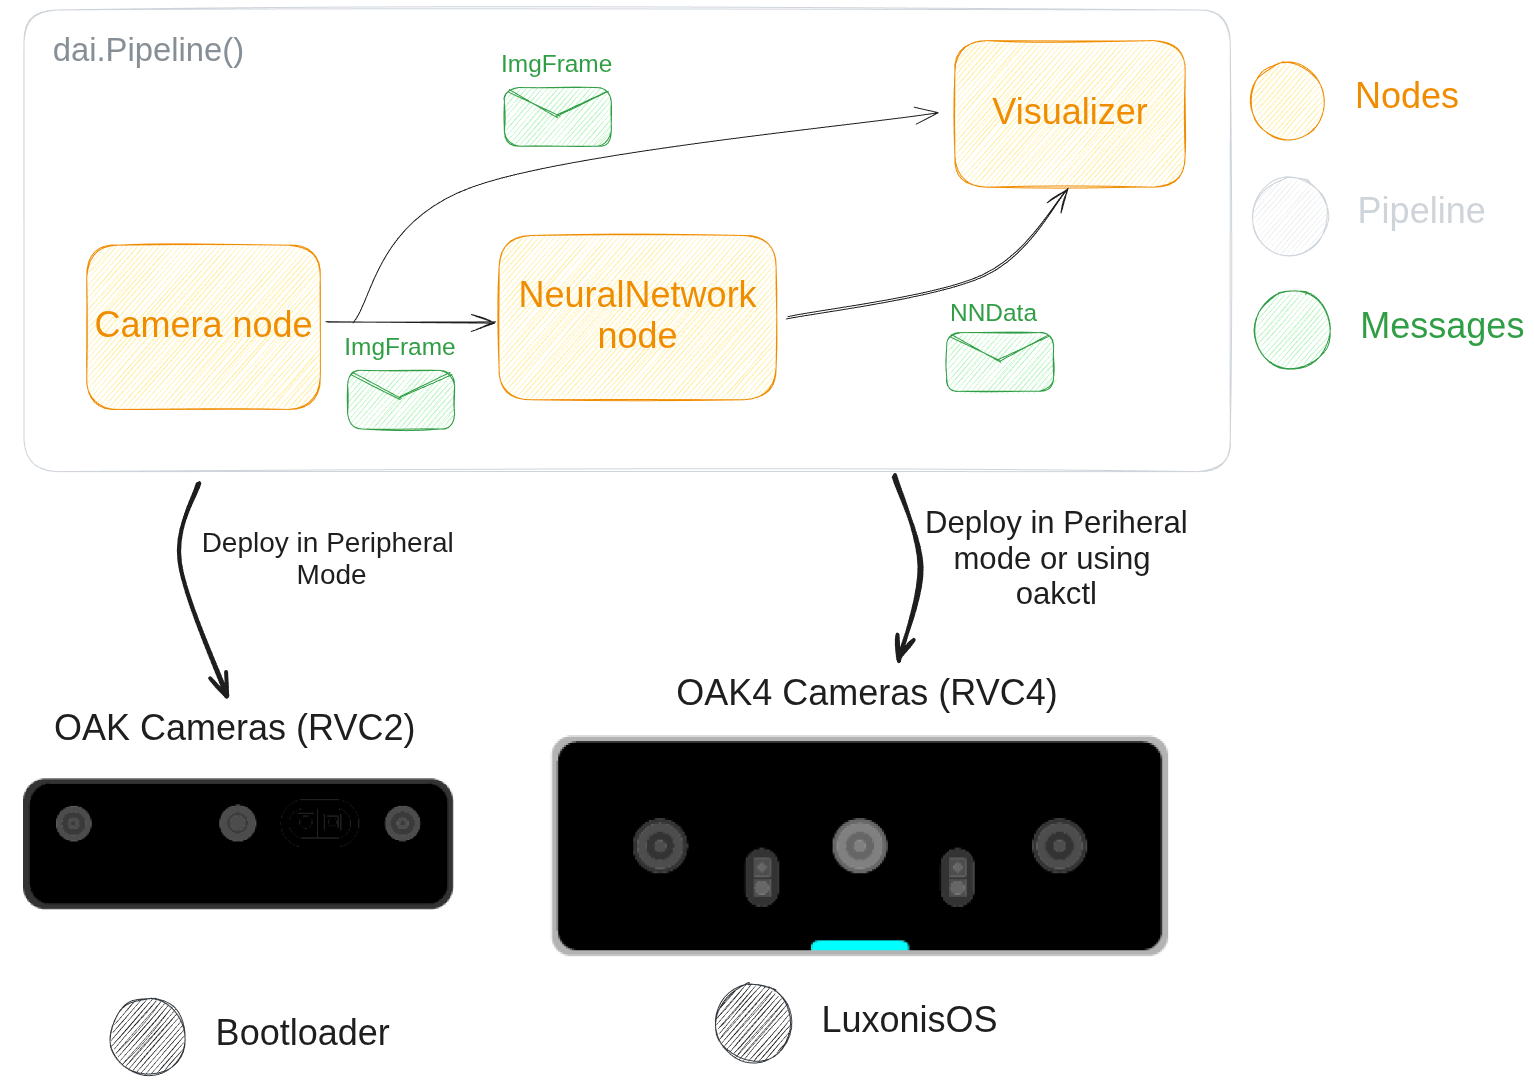
DepthAI Components
- Nodes represent a sensor, accelerated hardware, or some compute function
- Pipeline consists of linked nodes and gets deployed to the device where it runs on accelerated hardware blocks
- Messages are used for communication between nodes. They hold data and metadata
- Device represents Luxonis' device - OAK or OAK4 camera. It handles connectivity and communication
- Bootloader handles logic when booting RVC2 devices and makes them accessible for connection
- Luxonis OS is a custom Linux distro for RVC4 devices (OAK4)
Deploying AI models
Pretrained models
Custom models
- (Recommended) Online via HubAI
- Offline via ModelConverter (
nn_archive.tar.xz) - HubAI uses this tool, but it's more user-friendly - Using SNPE tool directly (
.dlc) - ModelConverter uses SNPE under the hood for RVC4 platform
.dlc, you can deploy it to OAK4 by editing NeuralNetwork example with the following snippet:Python
1nn = pipeline.create(dai.node.NeuralNetwork)
2nn.setModelPath('my_model.dlc')
3nn.setBackend("snpe") # Specify SNPE NN backend. This usually gets set under the hood
4# Specify SNPE (RVC4) specific settings, like DSP runtime and NN performance profile
5nn.setBackendProperties({"runtime": "dsp", "performance_profile": "default"})archive.tar.xz, you can edit that example with this snippet:Python
1cam = pipeline.create(dai.node.Camera).build(socket)
2# If your nn model requires 640x640 input size (BGR):
3cam_out = cam.requestOutput((640, 640), dai.ImgFrame.Type.BGR888p)
4
5nn_archive = dai.NNArchive('./my_nn_archive.tar.xz')
6nn = pipeline.create(dai.node.NeuralNetwork).build(cam_out, nn_archive)