Dynamic Calibration
Dynamic Calibration is a self-calibration workflow built into DepthAI 3.0 that restores and maintains stereo accuracy when temperature changes, physical shocks, or long-term drift degrade factory calibration.
Key capabilities
- Restore depth performance—brings the disparity map back to optimal visual quality.
- Broad compatibility—works on all stereo devices supported by DepthAI 3.0.
- No targets required—operate in natural scenes; just move the camera to capture a varied view.
- Rapid execution—typically completes in seconds.
- Health monitoring—run diagnostics at any time without flashing new calibration.
Try it out in OAK viewer
The fastest way to test the capabilities of Dynamic Calibration is by using the latest version of the OAK-Viewer:OAK Viewer
OAK Viewer is a desktop GUI application that allows you to visualize the camera's streams and interact with the device. It is available for Windows, macOS, and Linux.
Click here to get started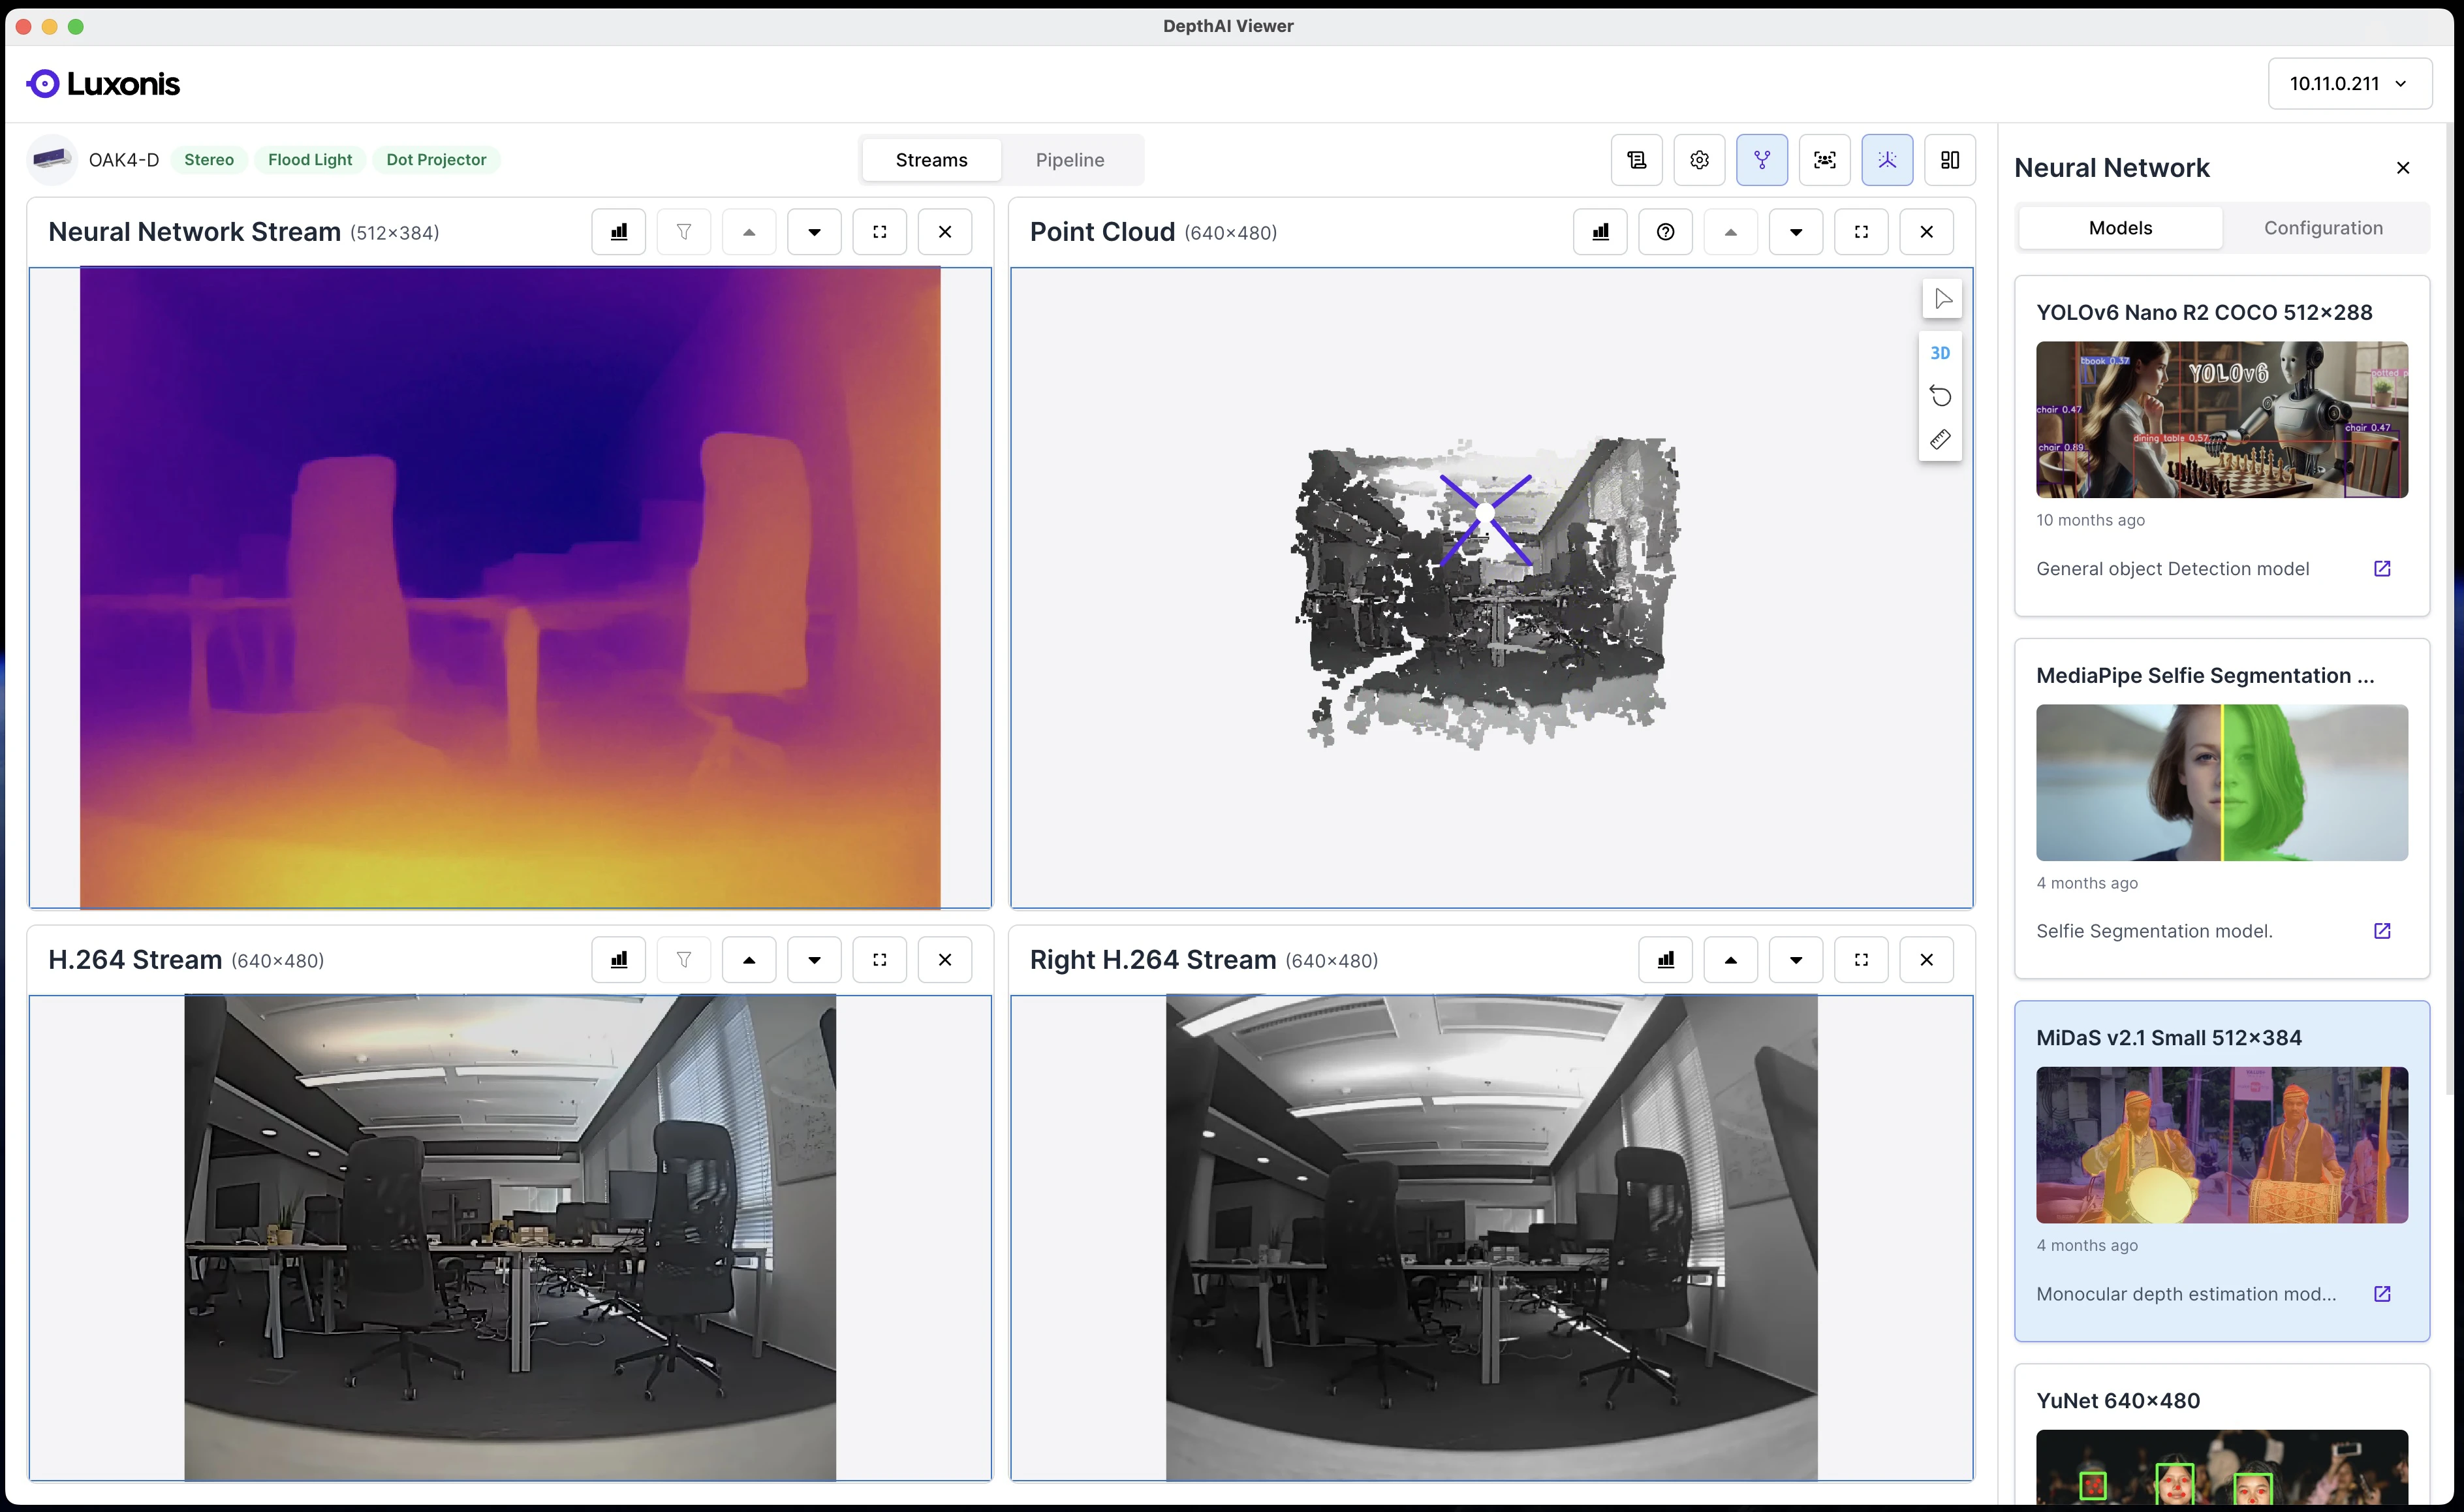
Usage of the Dynamic Calibration Library (DCL)
This section is a simple high-level representation of how to use theDynamicCalibration node in DepthAI for dynamic calibration workflows.Dynamic calibration takes as input a DynamicCalibrationControl message with a command (eg. ApplyCalibration, Calibrate, ... see all available commands in the message definition). The node returns an output in one of the three output queues:calibrationOutputwith message type DynamicCalibrationResult,qualityOutputwith message type CalibrationQualitycoverageOutputwith message type CoverageData
Initializing the DynamicCalibration Node
TheDynamicCalibration node requires two synchronized camera streams from the same device. Here's how to set it up:Python
1import depthai as dai
2
3# initialize the pipeline
4pipeline = dai.Pipeline()
5
6# Create camera nodes
7cam_left = pipeline.create(dai.node.Camera).build(dai.CameraBoardSocket.CAM_B)
8cam_right = pipeline.create(dai.node.Camera).build(dai.CameraBoardSocket.CAM_C)
9
10# Request full resolution NV12 outputs
11left_out = cam_left.requestFullResolutionOutput()
12right_out = cam_right.requestFullResolutionOutput()
13
14# Initialize the DynamicCalibration node
15dyn_calib = pipeline.create(dai.node.DynamicCalibration)
16
17# Link the cameras to the DynamicCalibration
18left_out.link(dyn_calib.left)
19right_out.link(dyn_calib.right)
20
21device = pipeline.getDefaultDevice()
22calibration = device.readCalibration()
23device.setCalibration(calibration)
24
25pipeline.start()
26while pipeline.isRunning():
27    ...
Sending Commands to the Node
Nodes in DepthAI communicate via input/output message queues. The DynamicCalibration node has several queues, but the most important for control is the inputControl queue.Python
1# Initialize the command input queue
2command_input = dyn_calib.inputControl.createInputQueue()
3# Example command of sending a
4command_input.send(
5    dai.DynamicCalibrationControl(
6        dai.DynamicCalibrationControl.Commands.StartCalibration()
7    )
8)StartCalibration()- Starts the calibration process.StopCalibration()- Stops the calibration process.Calibrate(force=False)- Computes a new calibration based on the loaded data.- force - no restriction on loaded data
CalibrationQuality(force=False)- Evaluates the quality of the current calibration.- force - no restriction on loaded data
LoadImage()- Load one image from the device.ApplyCalibration(calibration)- Apply calibration to the device.SetPerformanceMode(performanceMode)- Send performance mode which will be used.ResetData()- Remove all previously loaded data.
Receiving Data from the Node
The node provides multiple output queues:coverageOutput→ coverage statistics (CoverageData)calibrationOutput→ calibration results (DynamicCalibrationResult)qualityOutput→ calibration quality check (CalibrationQuality)
Python
1# queue for recieving new calibration
2calibration_output = dyn_calib.calibrationOutput.createOutputQueue()
3# queue for revieving the coverage
4coverage_output = dyn_calib.coverageOutput.createOutputQueue()
5# queue for checking the calibration quality
6quality_output = dyn_calib.qualityOutput.createOutputQueue()DynamicCalibrationResult, CoverageData and CalibrationQuality to see exact data structures of the outputs.Reading Coverage Data
Coverage data is received viacoverageOutput when an image is loaded either manually (with LoadImage command) or during continuous calibration (after running StartCalibration command).Manual Image LoadPython
1# Load a single image
2command_input.send(
3	dai.DynamicCalibrationControl(
4        dai.DynamicCalibrationControl.Commands.LoadImage()
5    )
6)
7
8# Get coverage after loading
9coverage = coverage_output.get()
10print(f"Coverage = {coverage.meanCoverage}")Python
1command_input.send(
2	dai.DynamicCalibrationControl(
3        dai.DynamicCalibrationControl.Commands.StartCalibration()
4    )
5)
6
7
8while pipeline.isRunning():
9    # Blocking read
10    coverage = coverage_output.get()
11    print(f"Coverage = {coverage.meanCoverage}")
12
13    # Non-blocking read
14    coverage = coverage_output.tryGet()
15    if coverage:
16        print(f"Coverage = {coverage.meanCoverage}")
Reading Calibration Data
Calibration results can be obtained from:dai.DynamicCalibrationControl.Commands.StartCalibration()— starts collecting data and attempts calibration.dai.DynamicCalibrationControl.Commands.Calibrate(force=False)— calibrates with existing loaded data (image must be loaded beforehand withLoadImagecommand as can be seen in the example below).
Python
1# Load a single image
2command_input.send(
3	dai.DynamicCalibrationControl(
4        dai.DynamicCalibrationControl.Commands.LoadImage()
5    )
6)
7
8# Send a command to calibrate
9command_input.send(
10    dai.DynamicCalibrationControl(
11        dai.DynamicCalibrationControl.Commands.Calibrate(force=False)
12    )
13)
14
15# Get calibration after loading
16calibration = calibration_output.get()
17print(f"Calibration = {calibration.info}")Python
1# Starts collecting data and attempts calibration
2command_input.send(
3	dai.DynamicCalibrationControl(
4        dai.DynamicCalibrationControl.Commands.StartCalibration()
5    )
6)
7
8while pipeline.isRunning():
9    # Blocking read
10    calibration = calibration_output.get()
11    print(f"Calibration = {calibration.info}")
12
13    # Non-blocking read
14    calibration = calibration_output.tryGet()
15    if calibration:
16        print(f"Calibration = {calibration.info}")
Performance Modes
Set the performance mode withPython
1# Set performance mode
2dynCalibInputControl.send(
3    dai.DynamicCalibrationControl(
4        dai.DynamicCalibrationControl.Commands.SetPerformanceMode(
5            dai.node.DynamicCalibration.OPTIMIZE_PERFORMANCE
6        )
7    )
8)Python
1dai.node.DynamicCalibration.PerformanceMode.OPTIMIZE_PERFORMANCE  # The most strict mode
2dai.node.DynamicCalibration.PerformanceMode.DEFAULT               # Less strict but mostly sufficient
3dai.node.DynamicCalibration.PerformanceMode.OPTIMIZE_SPEED        # Optimize speed over performance
4dai.node.DynamicCalibration.PerformanceMode.STATIC_SCENERY        # Not strict
5dai.node.DynamicCalibration.PerformanceMode.SKIP_CHECKS           # Skip all internal checks
Examples
Dynamic Calibration Interactive Visualizer
Calibration Quality Check
Dynamic Calibration
Dynamic Calibration Interactive Visualizer
With the following interactive example you can start or force calibration, load images, check quality, undo or apply changes, and reset or update the system. The interface shows clear progress and results with color bars, summaries of changes, an optional depth view, and a help panel you can turn on or off.Command Line
1git clone --depth 1 --branch main https://github.com/luxonis/oak-examples.git
2cd oak-examples/dynamic-calibration/
3pip install -r requirements.txt
4python3 main.py
Dynamic Calibration will not fully restore the factory-specified absolute depth accuracy. Use factory tools for production-grade re-calibration.
Performance & scenery guidelines
Capture a diverse scene
- Include textured objects at multiple depths.
- Avoid blank walls or featureless surfaces.
- Slowly move the camera to cover the full FOV; avoid sudden motions.
Suitable Scenes for Calibration
Good calibration scenes make it easier for algorithms to detect, match, and track features. Recommended characteristics:| Recommendation | Original Image VS. Feature Coverage (in green) |
|---|---|
| Ensure rich texture and visual detail - rich textures, edges, and objects evenly distributed across FOV create ideal calibration conditions | 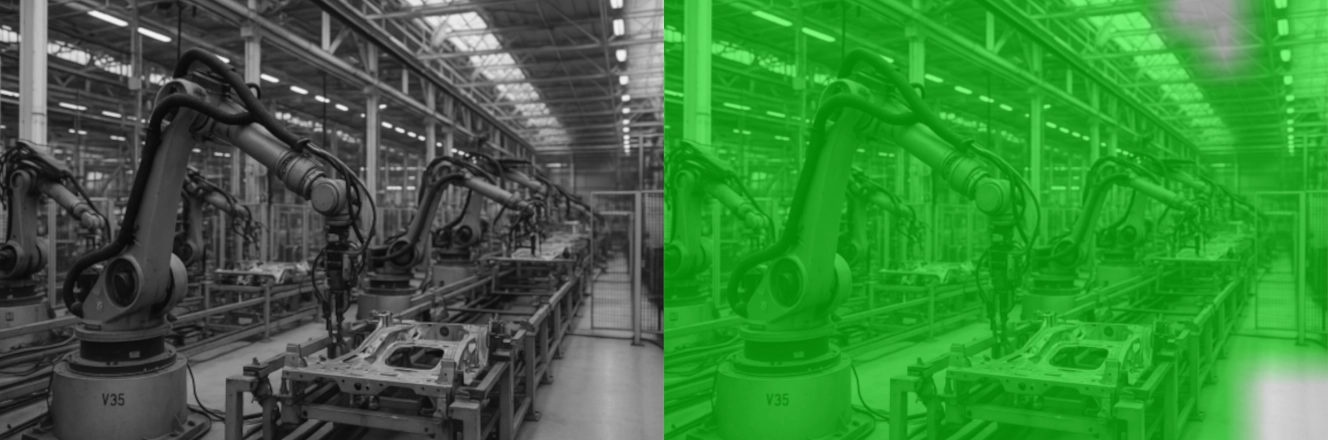 |
| Avoid flat or featureless surfaces - lack of textured surfaces or visually distinct objects provide little usable features | 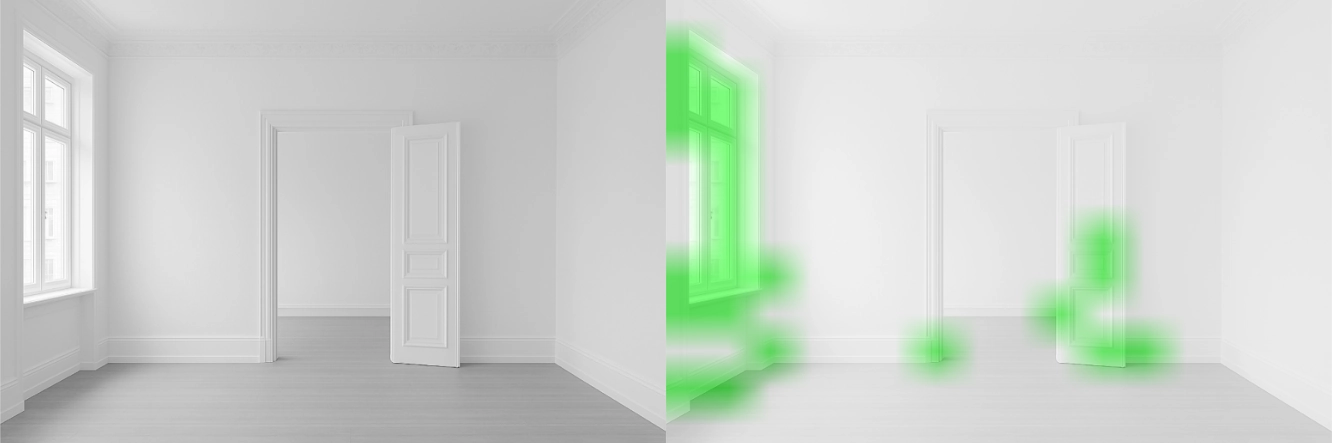 |
| Avoid reflective and transparent surfaces - reflective and transparent surfaces create false 3D features | 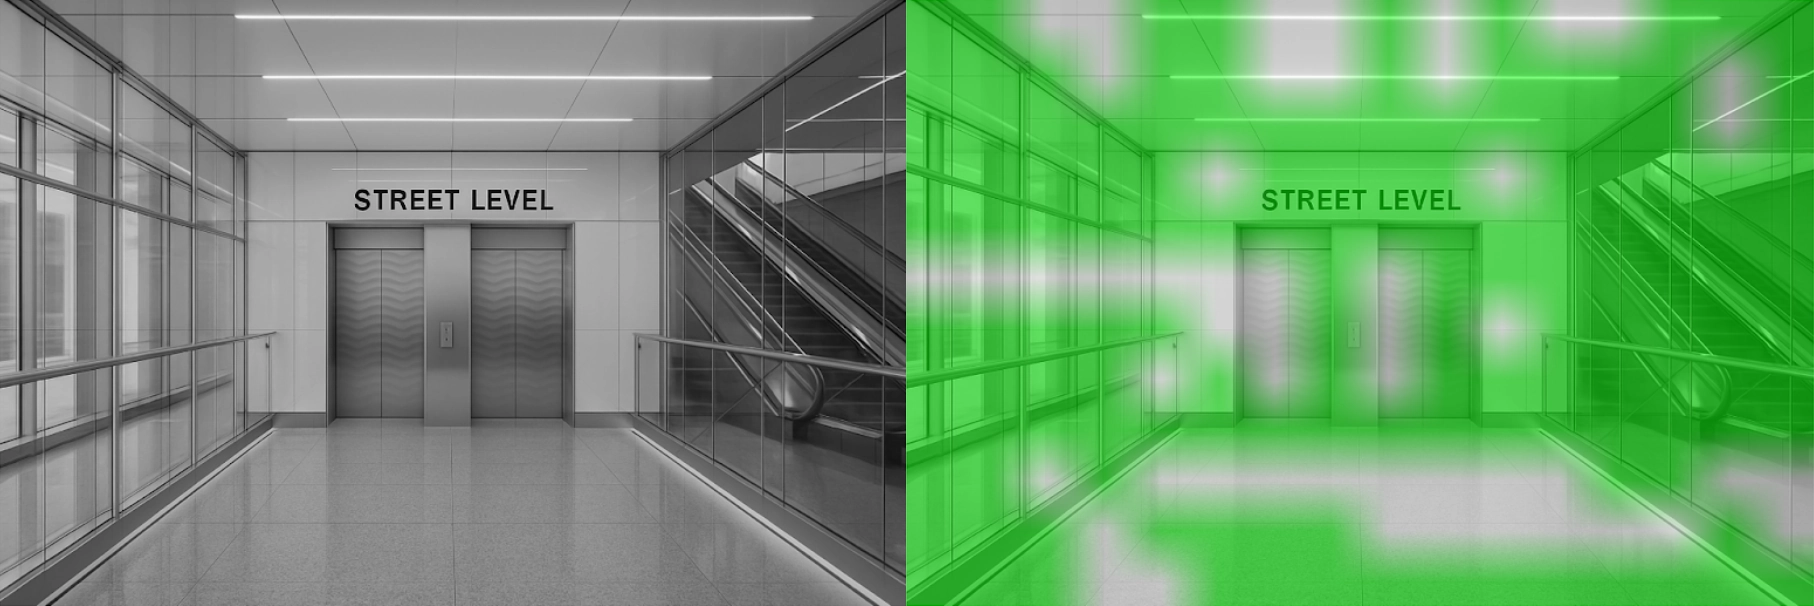 |
| Avoid dark scenes - low contrast, shadows, and poorly lit scenes yield few detectable features | 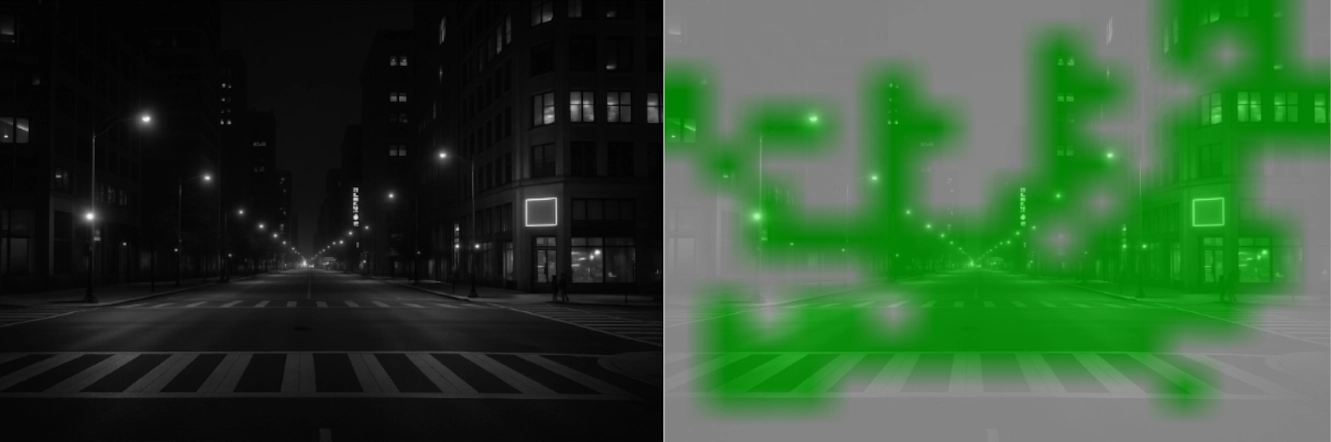 |
| Avoid repetitive patterns - many patterned regions look too similar to tell apart | 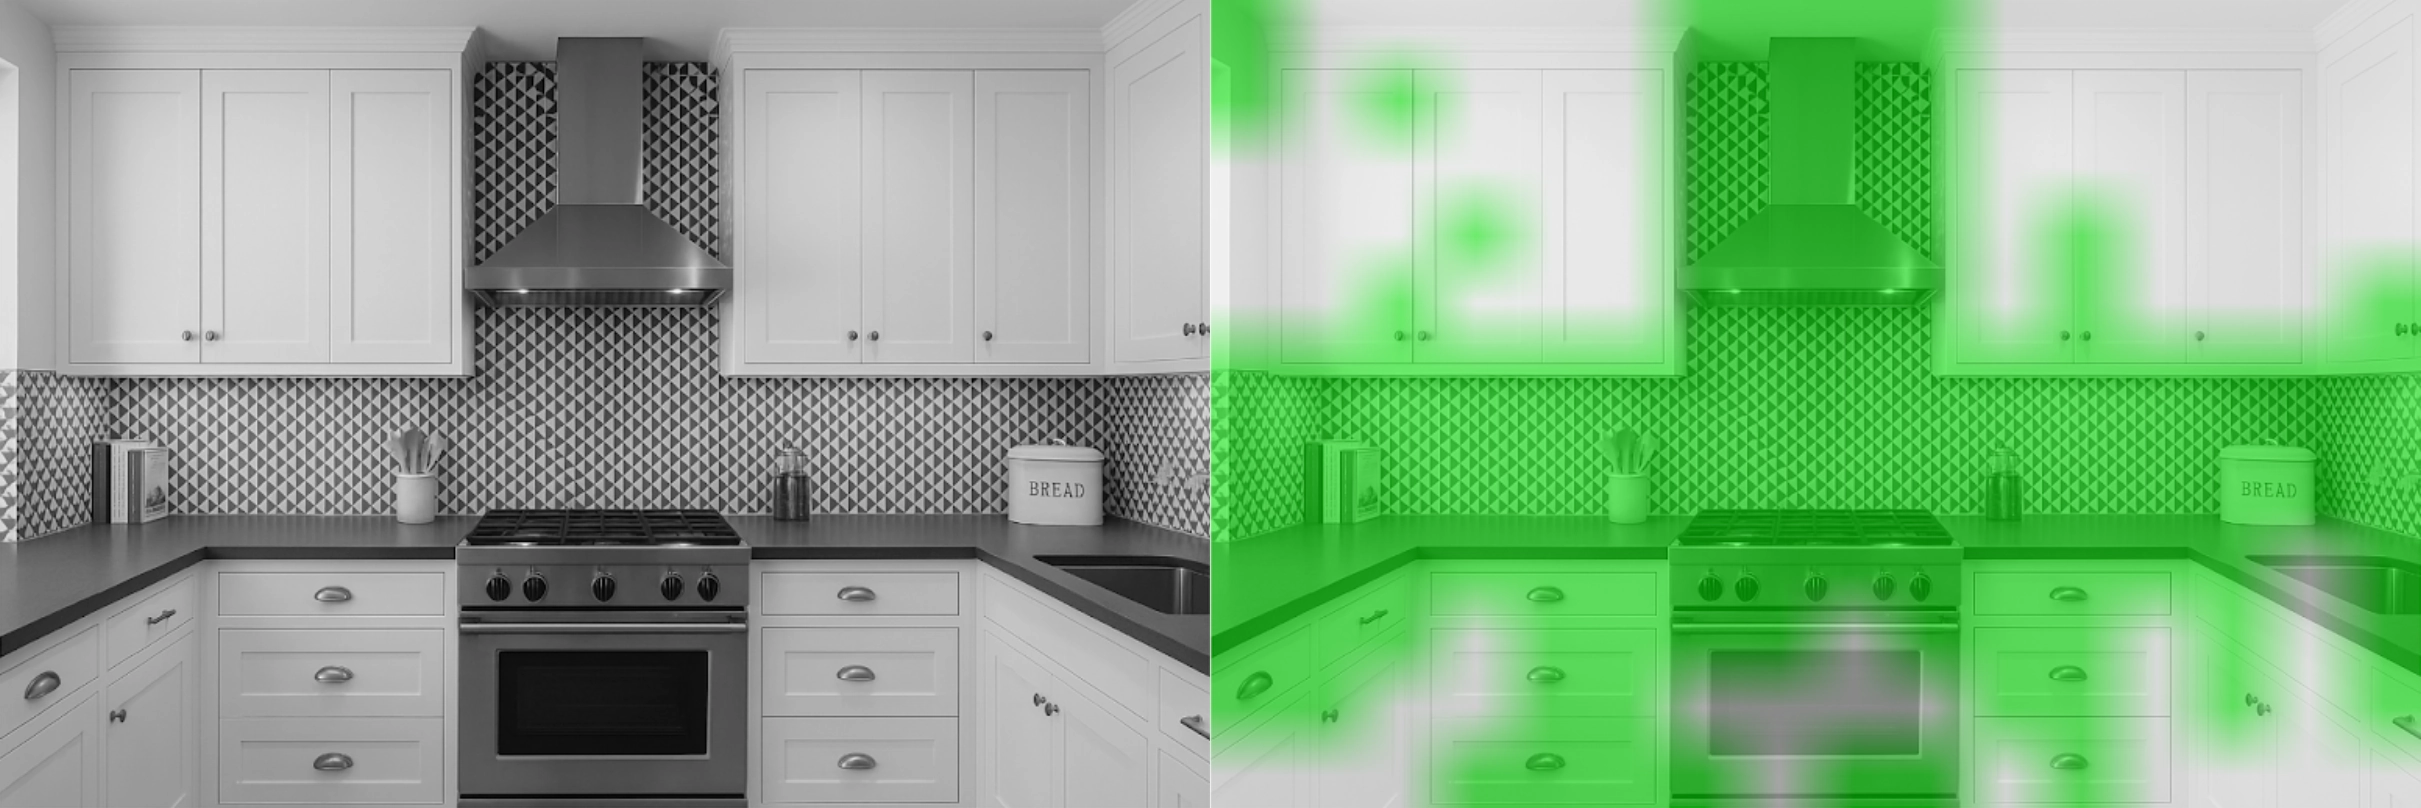 |
PerformanceMode tuning
| Mode | When to use |
|---|---|
DEFAULT | Balanced accuracy vs. speed. |
STATIC_SCENERY | Camera is fixed, scene stable. |
OPTIMIZE_SPEED | Fastest calibration, reduced precision. |
OPTIMIZE_PERFORMANCE | Maximum precision in feature-rich scenes. |
SKIP_CHECKS | Automated pipelines, were internal check to guarantee scene quality are ignored. |
For highest accuracy, combine OPTIMIZE_PERFORMANCE with a dynamic, well-featured environment.
Limitations & notes
- Supported devices — Dynamic Calibration is available for:
- All stereo OAK Series 2 cameras (excluding FFC)
- All stereo OAK Series 4 cameras
- DepthAI version — requires DepthAI 3.0 or later.
- Re-calibrated parameters — updates extrinsics only; intrinsics remain unchanged.
- OS support — Available on Linux, MacOS and Windows.
- Absolute depth spec — DCL improves relative depth perception; absolute accuracy may still differ slightly from the original factory spec.
Troubleshooting
| Symptom | Possible cause | Fix |
|---|---|---|
| High reprojection error | Incorrect model name or HFOV in board config | Verify board JSON and camera specs |
| Depth still incorrect after “successful” DCL | Left / right cameras swapped | Swap sockets or update board config and recalibrate |
nullopt quality report | Insufficient scene coverage | Move camera to capture richer textures |
Runtime error: "The calibration on the device is too old to perform DynamicCalibration, full re-calibration required!" | The device calibration is too outdated for dynamic recalibration to provide any benefit. | A newer device is needed |