Manual DepthAI installation
This guide will go through the first steps with setting up the OAK camera and DepthAI library.1
Installing dependencies
Supported Platforms
Ubuntu/Debian
Execute the below command to install the required dependencies:Command Line
1sudo wget -qO- https://docs.luxonis.com/install_dependencies.sh | bash- perform apt update and upgrade
- install python3, pip3, cmake, git, udev (if not already installed)
- install other dependencies like libusb, libudev, and others
If OpenCV fails with illegal instruction after installing from PyPi, add:
Command Line
1echo "export OPENBLAS_CORETYPE=ARMV8" >> ~/.bashrc
2source ~/.bashrc
MacOS
Execute the below command to install the required dependencies:Command Line
1curl -fL https://docs.luxonis.com/install_dependencies.sh | bash- install brew and git (if not already installed)
Windows 10/11
You can install the requirements via the Windows Installer or manually using Chocolatey package manager:Installing via Chocolatey
To install Chocolatey and use it to install DepthAI’s dependencies do the following:- Right click on Start
- Choose Windows PowerShell (Admin) and run the following:
Powershell
1Set-ExecutionPolicy Bypass -Scope Process -Force; [System.Net.ServicePointManager]::SecurityProtocol = [System.Net.ServicePointManager]::SecurityProtocol -bor 3072; iex ((New-Object System.Net.WebClient).DownloadString('https://chocolatey.org/install.ps1'))- Close the PowerShell and then re-open another PowerShell (Admin) by repeating the first two steps.
- Install Python and PyCharm
Powershell
1choco install cmake git python pycharm-community -yWindows 7
Although we do not officially support Windows 7, members of the community have had success manually installing WinUSB using Zadig. After connecting your DepthAI device look for a device with USB ID: 03E7 2485 and install the WinUSB driver by selecting WinUSB(v6.1.7600.16385) and then Install WCID Driver.Docker
We maintain a Docker image containing DepthAI, it’s dependencies and helpful tools in the luxonis/depthai-library repository on Docker Hub. It builds upon the luxonis/depthai-base image.Run thergb_preview.py example inside a Docker container on a Linux host (with the X11 windowing system):Command Line
1docker pull luxonis/depthai-library
2docker run --rm \
3    --privileged \
4    -v /dev/bus/usb:/dev/bus/usb \
5    --device-cgroup-rule='c 189:* rmw' \
6    -e DISPLAY=$DISPLAY \
7    -v /tmp/.X11-unix:/tmp/.X11-unix \
8    luxonis/depthai-library:latest \
9 python3 /depthai-python/examples/ColorCamera/rgb_preview.pyxhost local:root on the host.If you are using OAK POE device on Linux host machine, you should add --network=host argument to your docker command, so depthai inside docker will be able to communicate with the OAK POE.
WSL 2
Steps below were performed on WSL 2 running Ubuntu 20.04, while host machine was running Win10 20H2 (OS build 19042.1586). Original tutorial written here by SputTheBot.To get an OAK running on WSL 2, you first need to attach USB device to WSL 2. We have used usbipd-win (2.3.0) for that. Inside WSL 2 you also need to install depthai dependencies (Ubuntu/Debian) and USB/IP client tool (2 commands).To attach the OAK camera to WSL 2, we have prepared a Python script below that you need to execute on the host computer (in Admin mode).Python
1import time
2import os
3while True:
4    output = os.popen('usbipd wsl list').read() # List all USB devices
5    rows = output.split('\n')
6    for row in rows:
7        if ('Movidius MyriadX' in row or 'Luxonis Device' in row) and 'Not attached' in row: # Check for OAK cameras that aren't attached
8            busid = row.split(' ')[0]
9            out = os.popen(f'usbipd wsl attach --busid {busid}').read() # Attach an OAK camera
10            print(out)
11            print(f'Usbipd attached Myriad X on bus {busid}') # Log
12 time.sleep(.5)lsusb command inside the WSL 2 and you should be able to see Movidius MyriadX.If instead you want to use usbipd-win >= 4.0, then the usbipd wsl command is not available anymore, so you need to use a different script, originally written here by kazuya.Python
1import time
2import subprocess
3
4while True:
5    output = subprocess.run('usbipd list', capture_output=True, encoding="UTF-8")
6    rows = output.stdout.split('\n')
7    for row in rows:
8        if ('Movidius MyriadX' in row or 'Luxonis Device' in row) and 'Not shared' in row:
9            busid = row.split(' ')[0]
10            out = subprocess.run(f'usbipd bind -b {busid}', capture_output=True, encoding="UTF-8")
11            print(out.stdout)
12            print(f'Usbipd bind Myriad X')
13        if ('Movidius MyriadX' in row or 'Luxonis Device' in row) and 'Shared' in row:
14            busid = row.split(' ')[0]
15            out = subprocess.run(f'usbipd attach -w -b {busid}', capture_output=True, encoding="UTF-8")
16            print(out.stdout)
17            print(f'Usbipd attached Myriad X on bus {busid}')
18    time.sleep(0.5)
Examples that don't show any frames (eg. IMU example) should work. We haven't spent enough time to get OpenCV display frames inside WSL 2, but you could try it out yourself, some ideas here.
OpenSUSE
For openSUSE, available in this official article on how to install the OAK device on the openSUSE platform.Kernel Virtual Machine (KVM)
To access the OAK-D camera in the Kernel Virtual Machine, there is a need to attach and detach USB devices on the fly when the host machine detects changes in the USB bus.OAK-D camera changes the USB device type when it is used by DepthAI API. This happens in background when the camera is used natively. But when the camera is used in a virtual environment the situation is different.On your host machine, use the following code:Text
1SUBSYSTEM=="usb", ACTION=="bind", ENV{ID_VENDOR_ID}=="03e7", MODE="0666", RUN+="/usr/local/bin/movidius_usb_hotplug.sh depthai-vm"
2SUBSYSTEM=="usb", ACTION=="remove", ENV{PRODUCT}=="3e7/2485/1", ENV{DEVTYPE}=="usb_device", MODE="0666", RUN+="/usr/local/bin/movidius_usb_hotplug.sh depthai-vm"
3SUBSYSTEM=="usb", ACTION=="remove", ENV{PRODUCT}=="3e7/f63b/100", ENV{DEVTYPE}=="usb_device", MODE="0666", RUN+="/usr/local/bin/movidius_usb_hotplug.sh depthai-vm"Text
1#!/bin/bash
2# Abort script execution on errors
3set -e
4if [ "${ACTION}" == 'bind' ]; then
5  COMMAND='attach-device'
6elif [ "${ACTION}" == 'remove' ]; then
7  COMMAND='detach-device'
8  if [ "${PRODUCT}" == '3e7/2485/1' ]; then
9    ID_VENDOR_ID=03e7
10    ID_MODEL_ID=2485
11  fi
12  if [ "${PRODUCT}" == '3e7/f63b/100' ]; then
13    ID_VENDOR_ID=03e7
14    ID_MODEL_ID=f63b
15  fi
16else
17  echo "Invalid udev ACTION: ${ACTION}" >&2
18  exit 1
19fi
20echo "Running virsh ${COMMAND} ${DOMAIN} for ${ID_VENDOR}." >&2
21virsh "${COMMAND}" "${DOMAIN}" /dev/stdin <<END
22<hostdev mode='subsystem' type='usb'>
23  <source>
24    <vendor id='0x${ID_VENDOR_ID}'/>
25    <product id='0x${ID_MODEL_ID}'/>
26  </source>
27</hostdev>
28END
29exit 0ID_VENDOR_ID or ID_MODEL_ID), that is why you need to use PRODUCT environmental variable to identify which device has been disconnected.The virtual machine where DepthAI API application is running should have defined a udev rules that identify the OAK-D camera. The udev rule is described here.Solution provided by Manuel Segarra-Abad.VMware
Using the OAK-D device in a VMware requires some extra one-time settings that need to be set up for it to work.First of all, make sure the USB controller is switched from USB2 to USB3. Go toVirtual Machine Settings -> USB Controller -> USB compatibility and change to USB 3.1 (or USB 3.0 for older VMware versions, as available).Depending on what state the device is, there could be two devices showing up, and both need to be routed to the VM. Those could be visible at Player -> Removable Devices:- Intel Movidius MyriadX
- Intel VSC Loopback Device or Intel Luxonis Device
Command Line
1echo 'SUBSYSTEM=="usb", ATTRS{idVendor}=="03e7", MODE="0666"' | sudo tee /etc/udev/rules.d/80-movidius.rules
2sudo udevadm control --reload-rules && sudo udevadm triggerVirtualBox
If you want to use VirtualBox to run the DepthAI source code, please make sure that you allow the VM to access the USB devices. Also, be aware that by default, it supports only USB 1.1 devices, and DepthAI operates in two stages:- For showing up when plugged in. We use this endpoint to load the firmware onto the device, which is a usb-boot technique. This device is USB2.
- For running the actual code. This shows up after USB booting and is USB3.
 The last step is to add the USB Intel Loopback device. The depthai device boots its firmware over USB, and after it has booted, it shows up as a new device.This device shows just up when the depthai/OAK is trying to reconnect (during runntime, so right after running a pipeline on depthai, such as
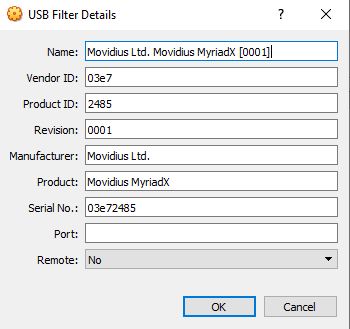
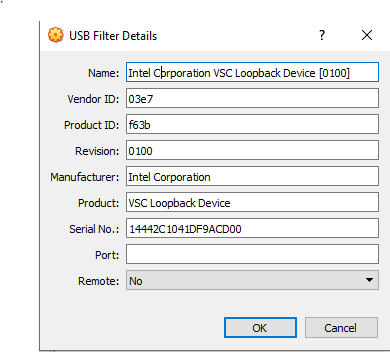
 python3 depthai_demo.py).It might take a few tries to get this loopback device shown up and added, as you need to do this while depthai is trying to connect after a pipeline has been built (and so it has at that point now booted its internal firmware over USB2).For enabling it only once, you can see the loopback device here (after the pipeline has been started):Find the loopback device right after you tell depthai to start the pipeline, and select it.  And then for permanently enabling this pass-through to virtual box, enable this in setting below: Making the USB Loopback Device for depthai/OAK, to allow the booted device to communicate in virtualboxMaking the USB Loopback Device for depthai/OAK, to allow the booted device to communicate in virtualbox
  And then for each additional depthai/OAK device you would like to pass through, repeat just this last loopback settings step for each unit (as each unit will have its own unique ID).
2
Installing DepthAI
After installing depthai dependencies, you can either refer to depthai-core for C++ development, or download the depthai Python library via PyPi:Next install the requirements for this repository. Note that we recommend installing the dependencies in a virtual environment, so that they don't interfere with other Python tools/environments on your system.Now, run the If all goes well a small window video display should appear. And example is shown below:
Command Line
1python3 -m pip install depthaiTest Installation
We have a set of examples that should help you verify if your setup was correct.First, clone the depthai-python repository and change directory into this repo:Command Line
1git clone https://github.com/luxonis/depthai-python.git
2cd depthai-python- For development machines like Mac/Windows/Ubuntu/etc., we recommend the PyCharm IDE, as it automatically makes/manages virtual environments for you, along with a bunch of other benefits. Alternatively,
conda,pipenv, orvirtualenvcould be used directly (and/or with your preferred IDE). - For installations on resource-constrained systems, such as the Raspberry Pi or other small Linux systems, we recommend
conda,pipenv, orvirtualenv. To set up a virtual environment withvirtualenv, runvirtualenv venv && source venv/bin/activate.
Command Line
1cd examples
2python3 install_requirements.pyrgb_preview.py script from within examples directory to make sure everything is working:Command Line
1python3 ColorCamera/rgb_preview.pyRun Other Examples
After you have run this example, you can run other examples to learn about DepthAI possibilities. You can also proceed to:- Our tutorials, starting with a Hello World tutorial explaining the API usage step by step (here)
- Our experiments, containing implementations of various user use cases on DepthAI (here)
3
Running DepthAI Viewer
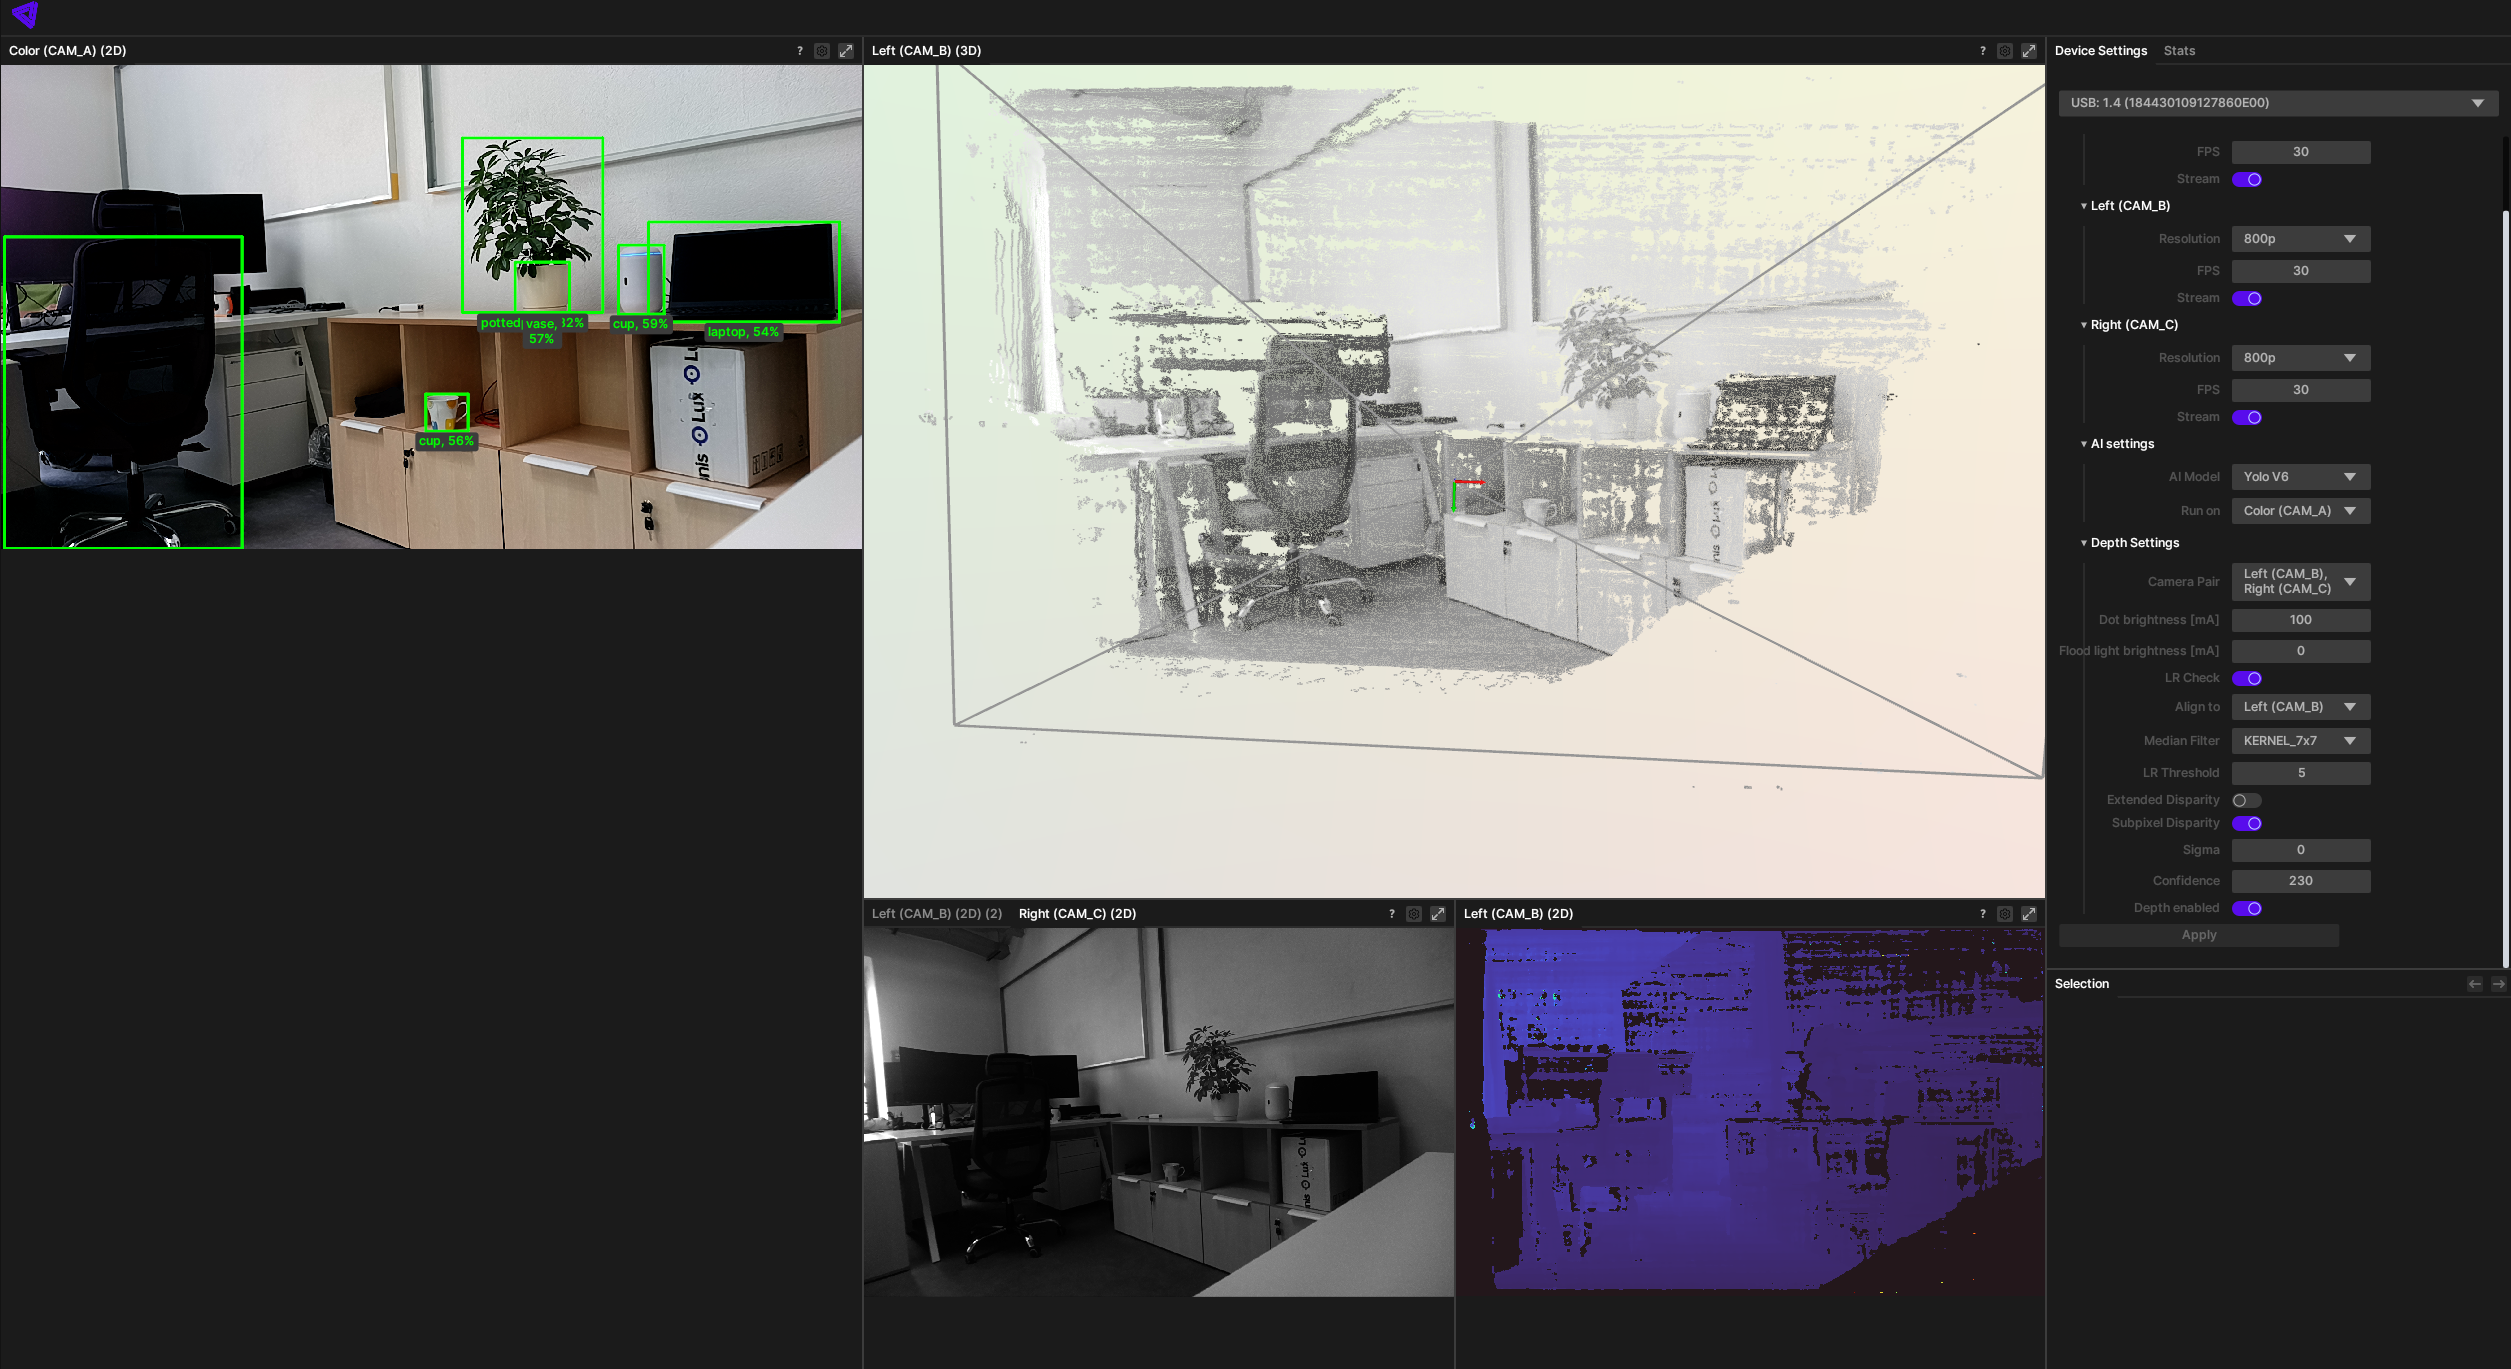
 DepthAI Viewer is the visualization tool for DepthAI and OAK cameras. It's a GUI application that will run a demo app by default, which will visualize all streams and run inference on the device. It also allows you to change the configuration of the device. DepthAI viewer works for USB and POE cameras.More info here.