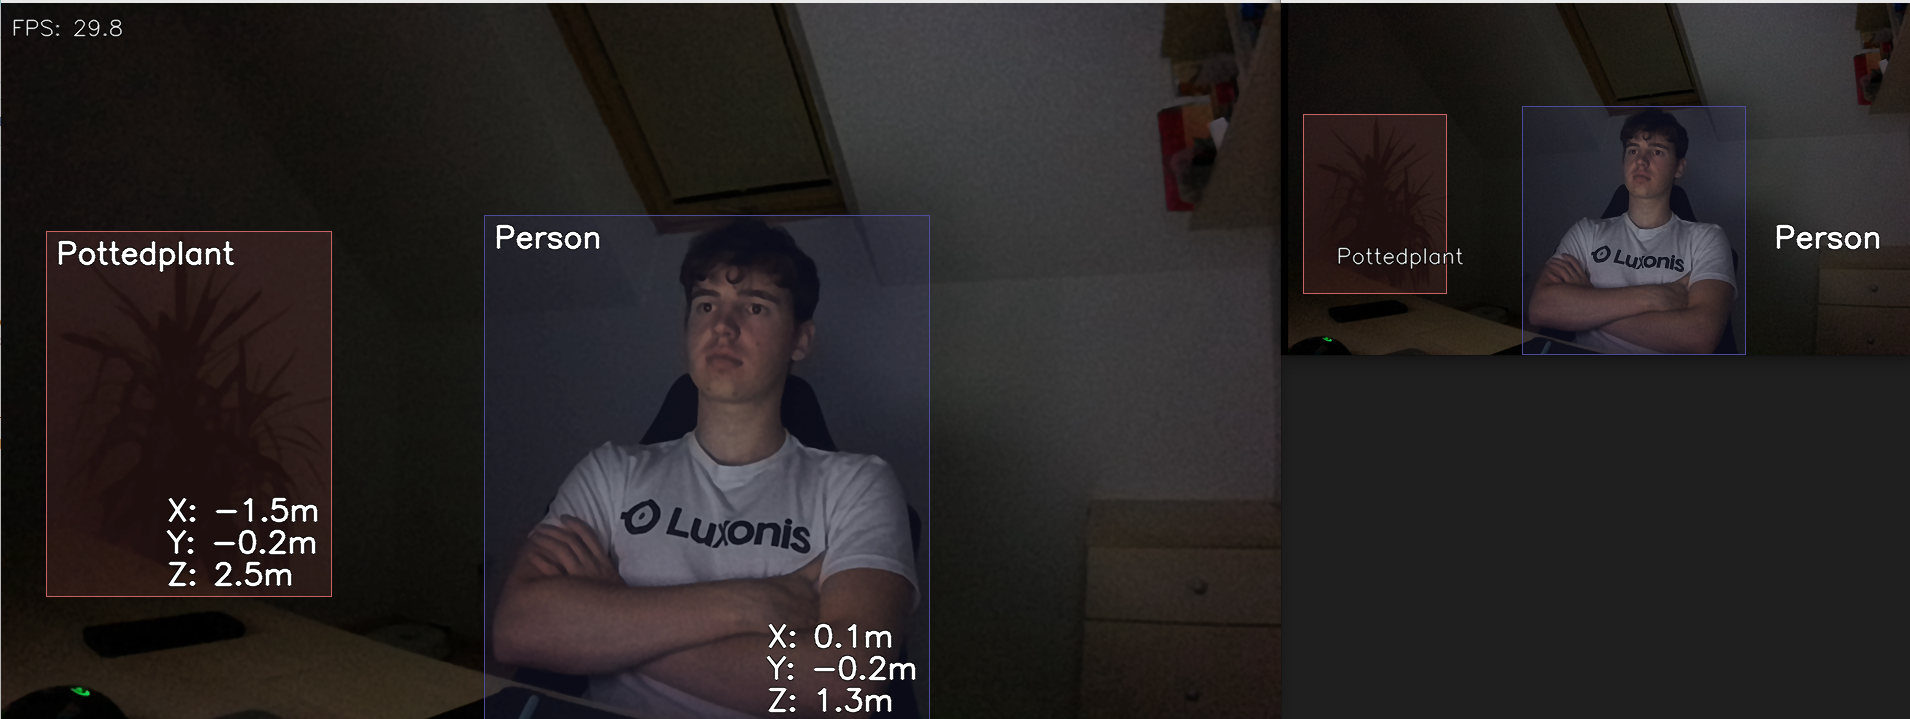
Spatial Detection
This example showcases the usage of spatial detection using MobileNet-SSD neural network.
For more information about spatial configuration (thresholds, averaging), please refer to config spatial reference.
Note
Visualization in current example is done with blocking behavor. This means that the program will halt at oak.start() until the window is closed.
This is done to keep the example simple. For more advanced usage, see Blocking behavior section.
Demo
Setup
Please run the install script to download all required dependencies. Please note that this script must be ran from git context, so you have to download the depthai repository first and then run the script
git clone https://github.com/luxonis/depthai.git
cd depthai/
python3 install_requirements.py
For additional information, please follow our installation guide.
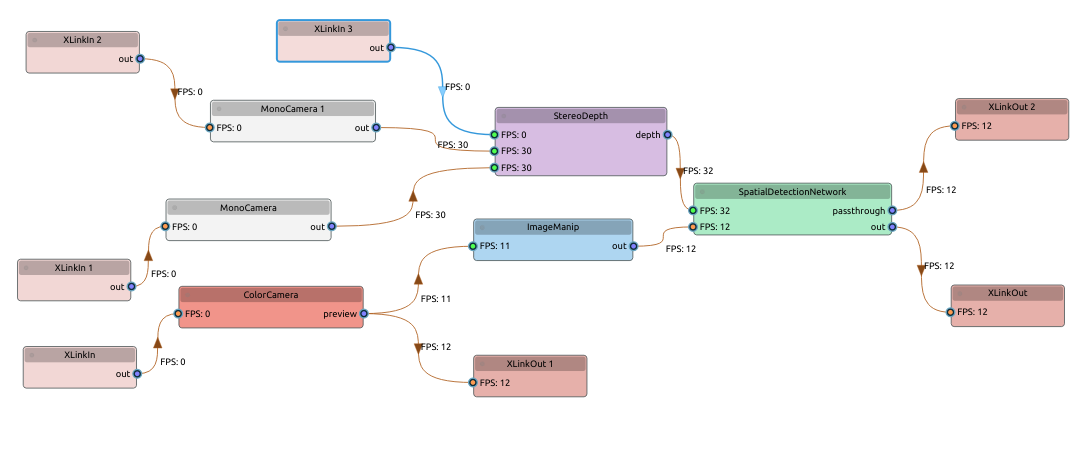
Pipeline
Source Code
Also available on GitHub
1 2 3 4 5 6 7 8 9 10 11 12 13 14 15 16 17 18 19 20 | from depthai_sdk import OakCamera import depthai as dai with OakCamera() as oak: color = oak.create_camera('color') # List of models that are supported out-of-the-box by the SDK: # https://docs.luxonis.com/projects/sdk/en/latest/features/ai_models/#sdk-supported-models nn = oak.create_nn('yolov6nr3_coco_640x352', color, spatial=True) nn.config_spatial( bb_scale_factor=0.5, # Scaling bounding box before averaging the depth in that ROI lower_threshold=300, # Discard depth points below 30cm upper_threshold=10000, # Discard depth pints above 10m # Average depth points before calculating X and Y spatial coordinates: calc_algo=dai.SpatialLocationCalculatorAlgorithm.AVERAGE ) oak.visualize(nn.out.main, fps=True) oak.visualize([nn.out.passthrough, nn.out.spatials]) oak.start(blocking=True) |