Visualizer Demo
This example shows how to use the visualizer component to display the detection results and configure the style of text and tracker.
Note
Visualization in current example is done with blocking behavor. This means that the program will halt at oak.start() until the window is closed.
This is done to keep the example simple. For more advanced usage, see Blocking behavior section.
Setup
Please run the install script to download all required dependencies. Please note that this script must be ran from git context, so you have to download the depthai repository first and then run the script
git clone https://github.com/luxonis/depthai.git
cd depthai/
python3 install_requirements.py
For additional information, please follow our installation guide.
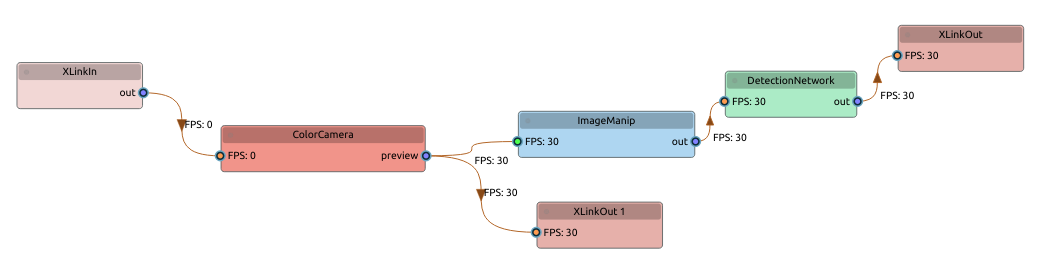
Pipeline
Source Code
Also available on GitHub.
1 2 3 4 5 6 7 8 9 10 11 12 13 14 15 16 17 18 19 20 21 22 23 24 | from depthai_sdk import OakCamera from depthai_sdk.visualize.configs import BboxStyle, TextPosition with OakCamera() as oak: camera = oak.create_camera('color') det = oak.create_nn('face-detection-retail-0004', camera) # Record visualized video into a mp4 file visualizer = oak.visualize(det.out.main, record_path='./test.mp4') # Chained methods for setting visualizer parameters visualizer.detections( # Detection-related parameters color=(0, 255, 0), thickness=2, bbox_style=BboxStyle.RECTANGLE, # Options: RECTANGLE, CORNERS, ROUNDED_RECTANGLE, ROUNDED_CORNERS label_position=TextPosition.MID, ).text( # Text-related parameters font_color=(255, 255, 0), auto_scale=True ).output( # General output parameters show_fps=True, ).tracking( # Tracking-related parameters line_thickness=5 ) oak.start(blocking=True) |